Email automation is powerful to boost affiliate sales. Unfortunately, only a small number of affiliate marketers are truly aware of it. Most of them still rely on SEO and social media.
If you haven’t tried email automation on your email marketing effort yet, then you should.
In this post, I will show you how to implement email automation to promote your affiliate products.
In case you have never heard of email automation before, then let’s start by getting to know it first.
Shortcuts ⤵️
- What is email automation?
- Email marketing vs SEO vs social media
- Recommended email automation platforms
- Implementing email automation in affiliate marketing
- Using MailerLite to create an automation workflow
- Summary
What is Email Automation and Why It’s Great for Affiliate Marketing
Simply put, email automation is when you send an email (or a series of emails) without manually sending it. Instead, your email automation platform does it for you.
Your email automation platform will send the email based on a certain condition.
For instance, it will send the email when someone joins a group, clicks a link, or buys a certain item.
In email automation, you can control the workflow.
For instance, if you use email automation to send a series of emails (email sequence), you can set the next email to be sent only if a link on the previous email is clicked.
That is why email automation is great for affiliate marketing because you can “force” your audience to click your affiliate link before they can continue to access your content.
Email Marketing vs SEO vs Social Media for Affiliate Marketing
Email automation is a part of email marketing. When it comes to boosting sales, email is more powerful than SEO and social media because you can add a personal touch to your emails.
For instance, you can mention the names of your potential customers in your emails so that they feel as if you are directly talking to them.
Adding a personal touch makes people feel so special. When you treat them this way, it becomes easier to sell them a product.
Another reason, you are building the real asset of your online business when you are building an email list.
With an email list, you own the traffic. You can send your content anytime without needing to worry about being filtered by the algorithm.
| SEO | Social media | ||
|---|---|---|---|
| Traffic type | Owned | Earned | Earned |
| Personalization | ✅ | ❌ | ❌ |
| Algorithm dependence | ❌ | ✅ | ✅ |
Recommended Email Automation Platforms for Affiliate Marketing
Most email marketing platforms come with an email automation feature. However, they mostly offer it as a paid feature.
The abilities of the email automation feature on each platform varies, but they mostly have the following abilities:
- To send email when someone joins a group/list
- To send email when someone is added to a tag
- To send email when someone clicks a link
- To send email when someone completes a form
- And so on
To create the email automation itself, you are provided with a visual editor. Here is an example of the email automation workflow editor in MailerLite.
Here are some email marketing platforms that come with an automation feature:
| Offers Free Version | Price of Pro Version | Automation Feature | |
|---|---|---|---|
| MailerLite | ✅ | Starts from $10/month | Available on the free version |
| Mailchimp | ✅ | Starts from $20/month | Only available on the pro version |
| Kit | ✅ | Starts from $39/month | Only available on the pro version |
| ActiveCampaign | ❌ | Starts from $15/month | Only available on the pro version |
| GetResponse | ❌ | Starts from $19/month | Only available on the pro version |
| AWeber | ❌ | Starts from $15/month | Only available on the pro version |
Implementing Email Automation in Affiliate Marketing
Promoting an affiliate product via content is still the best strategy because it’s almost impossible to do hard sales promoting someone’s brand due to legal issue.
In the past, the vast majority of affiliate marketers promoted their affiliate products via blog posts with the help of SEO.
The game has changed a bit now.
Owning a website is no longer necessary to promote an affiliate product because you can create content on social media platforms or YouTube (I still recommend you to build a website if you want to build a real online business via affiliate marketing or anything).
Another medium you may never think of to create content is, you guess it, email.
With email, you have full control over content delivery because there is no algorithm. But first, you need to build an email list (this is the hardest part to be honest).
The good news is, you can build and grow an email list while also promoting your affiliate product.
How come?
Simple enough. You ask people to give their email addresses to access your content where you plug your affiliate link into.
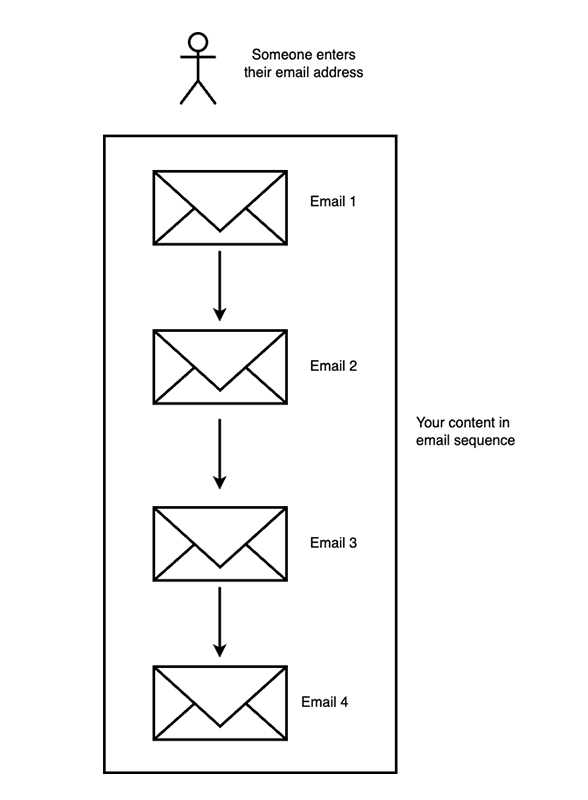
First, you create long-form content. But instead of publishing it as a blog post and hoping people will find it on search engines (which doesn’t necessarily happen), you can turn it into an email sequence.
You can plug your affiliate link into the emails in the sequence.
Then, you create a squeeze page containing an email opt-in form and promote it anywhere you want. Whether on social media, on your blog or even on paid platforms like Meta Ads and Google Ads.
When someone gives their email address, you deliver the content (emails).
Here is the real example of the above strategy.
Steps to Implementing Email Automation in Affiliate Marketing
I have briefly mentioned how to implement email automation in affiliate marketing. Now, here comes the details.
Step 1: Create the Content
The very first step you need to do is to create the content and turn it into an email sequence. The content should be long enough because you will split it into fragments (emails).
Also, make sure that your content has a specific goal or solve a specific problem.
Content that has a clear goal or solves a specific problem is easier to promote and is likely to have better conversions (email sign ups in this case).
In my email sequence, I turned my 1,000-word content into 3 fragments (emails) in which each fragment has around 300 words.
My goal with the content was to help WordPress users to build MRR (Monthly Recurring Revenue) via affiliate marketing.
I plug my affiliate link into the first email and ask my audience to click the link to access other parts of the content (the next emails) where I explain my exact strategy on how to pick the right affiliate programs and how to promote my affiliate links.
Of course, the length of the content varied depending on the complexity of the goal you offer or problem you try to solve with your content.
To create the content itself, you can use any document editor of your choice. I personally use Google Docs.
Step 2: Turn the Content Into an Email Sequence
Once your content is ready, the next step is to turn into an email sequence using an email automation platform of your choice. More about this will be covered later below.
Step 3: Create the Squeeze Page
Squeeze page is a landing page that has one purpose: to collect email addresses. Thus, you need to add an email opt-in form to your landing page and connect it with the email automation platform you use.
Page builders like Divi and Elementor have a form builder feature that supports integration with a wide range of email marketing platforms.
Most email marketing platforms also have a built-in page builder feature which you can use to create the squeeze page.
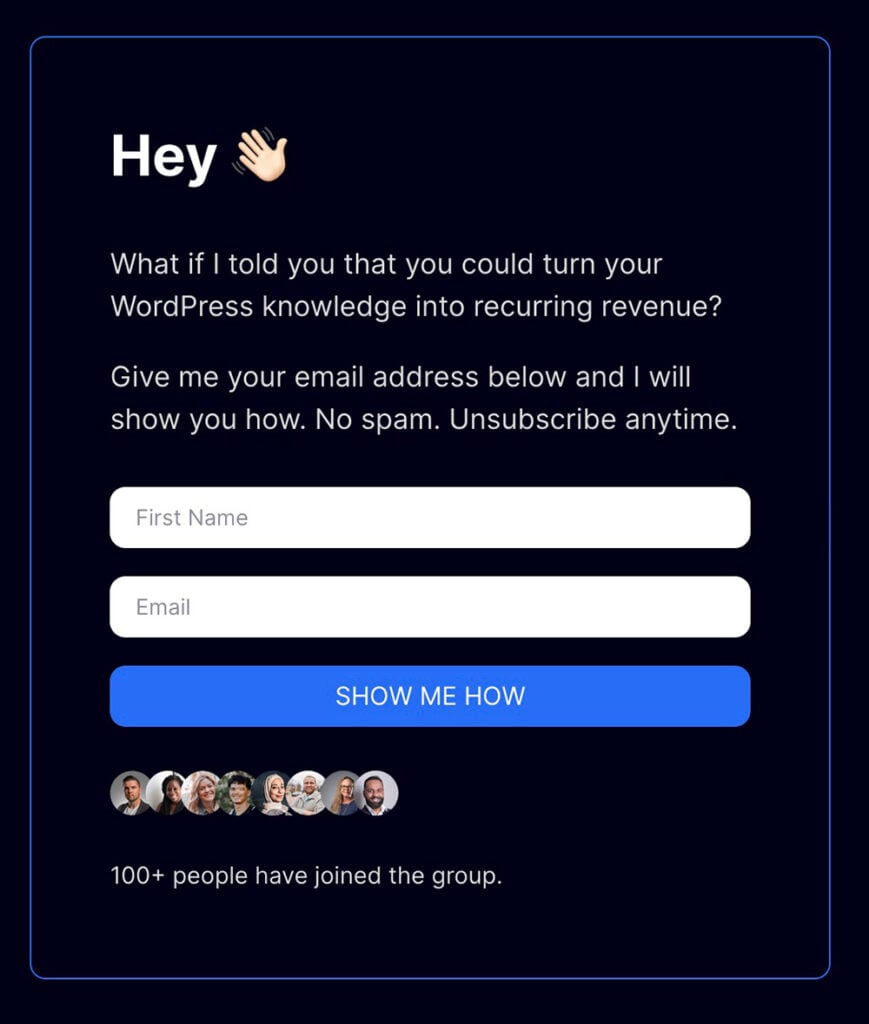
One crucial thing to note when creating a squeeze page: use a short copy and add curiosity. Here is an example.
Step 4: Promote the Squeeze Page
Once your squeeze page is ready, you can start to promote it. You can promote it anywhere. From social media to blog.
If you want to promote your squeeze page on your blog, you can book a spot on the header or footer to place the link of the squeeze page.
For immediate results, you can use platforms like Meta Ads or Google Ads to run paid ads.
If you truly want to use paid ads, you can work smartly by promoting affiliate products from affiliate programs that offer recurring commissions.
By promoting affiliate products with recurring commissions, no matter the money you spend on ads, you will end up being profitable after the break-even point. This is how you can work smartly as an affiliate marketer.
🚨 Want to access the full list of 300+ affiliate programs with recurring commissions? Simply click the button below.
Access the full list
Using MailerLite to Create an Automation Workflow to Promote an Affiliate Product
Above, you have created the content to promote your affiliate links. Now it’s the time to turn into an email sequence.
In this post, I will show you the mechanism of creating an email sequence in MailerLite.
I recommend MailerLite for two main reasons. First, it’s more affordable compared to other email marketing platforms (check the table again).
Second, the automation feature is available on the free version so that you can use it without needing to spend any money.
You can upgrade to the pro version (which is completely optional) once you already have steady income from your affiliate marketing effort.
I myself also use MailerLite to power my newsletter and email automation. Here is my complete review of MailerLite in case you want to learn more about it.
🚨 You can click the button below to create a free account on MailerLite.
Create a MailerLite account
The Mechanism to Create an Email Automation Workflow in MailerLite
If you want to use email marketing to promote affiliate products, I strongly recommend you to use a professional email account (email on a custom domain. E.g. you@yourdomain.com).
A professional email account indicates that you are a professional, not a random person trying to send spam emails.
If you can’t afford Google Workspace, you can use more affordable solutions like Hover, Zoho Mail and Spaceship.
Before you start to use MailerLite to collect email addresses and to send emails, make sure to setup the confirmation email fist. You can do so from the Account settings screen.
Here are the steps to create an email automation workflow in MailerLite.
On your MailerLite dashboard, click the Automations menu. This will take you to the Automations screen. Click the New automation button to create a new automation workflow.
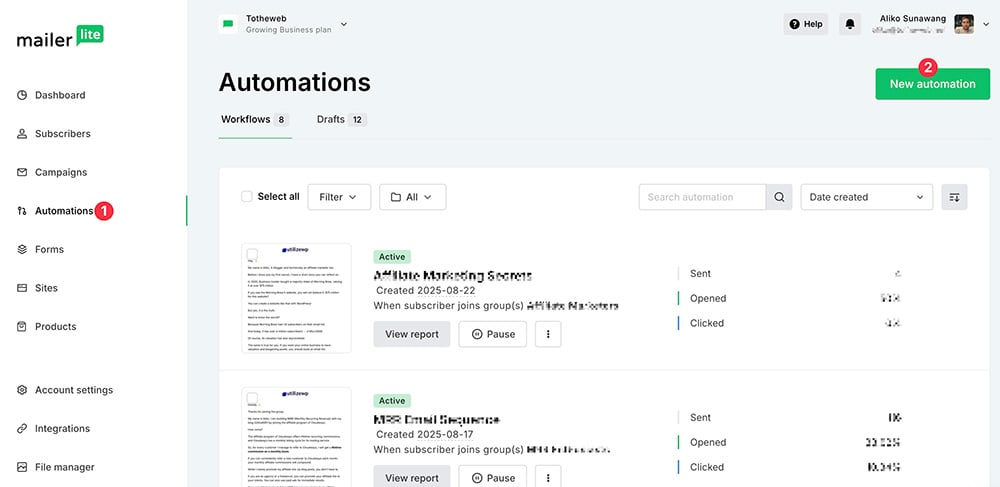
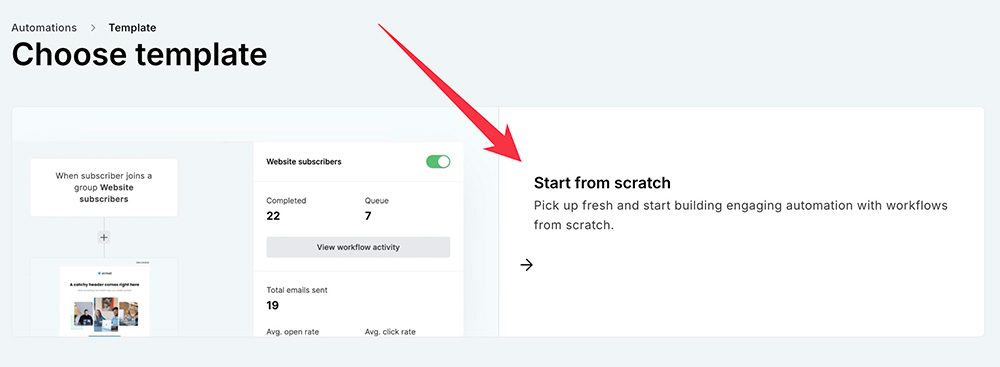
As you can see, there are several ready-to-use automation templates you can choose from. But in this example, I will show you how to create the email automation from scratch.
You can click the Start from scratch option to create email automation from scratch.
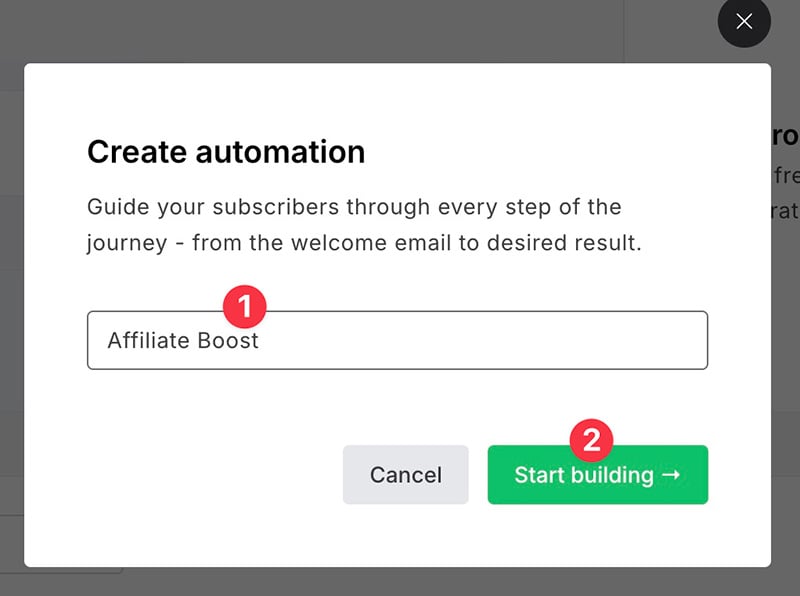
Give your automation a name on the appearing popup and click the Start building button.
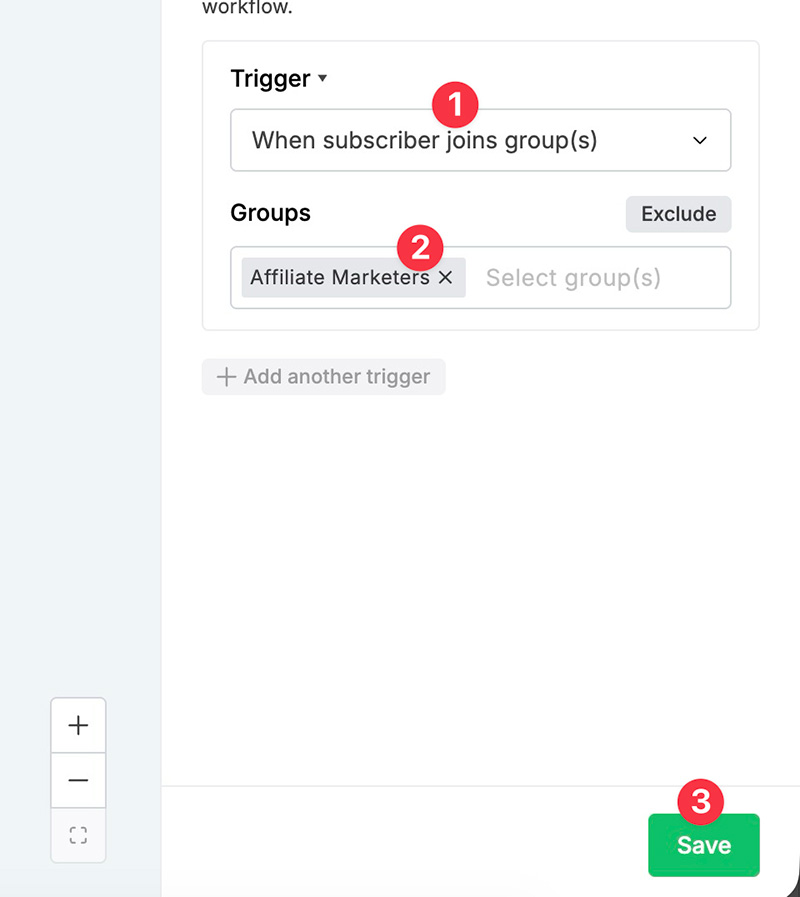
You will be taken to the automation workflow editor after clicking the Start building button above. The very first thing you need to do here is to set the automation trigger. This is the condition that needs to be met for your emails to be sent.
To set the trigger, you can go to the settings panel on the right side and select an option on the Trigger dropdown. Select a group (or any trigger you select) and click the Save button.
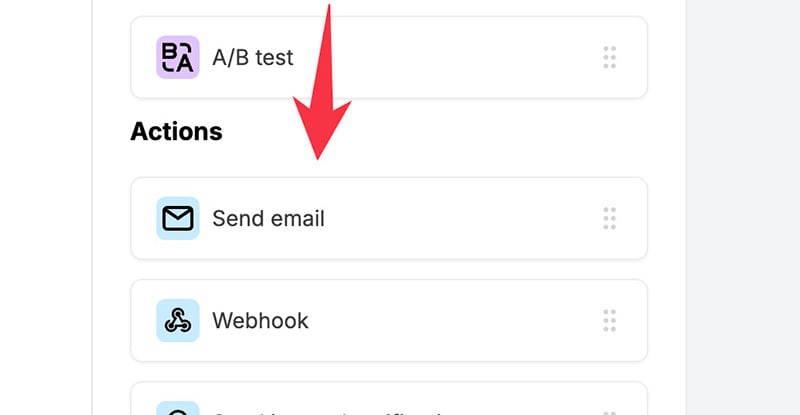
Next, you can add the steps to your workflow (every element you add to the workflow is called a step). To add a new step, you can simply click the plus icon and select the step you want to add from the left panel.
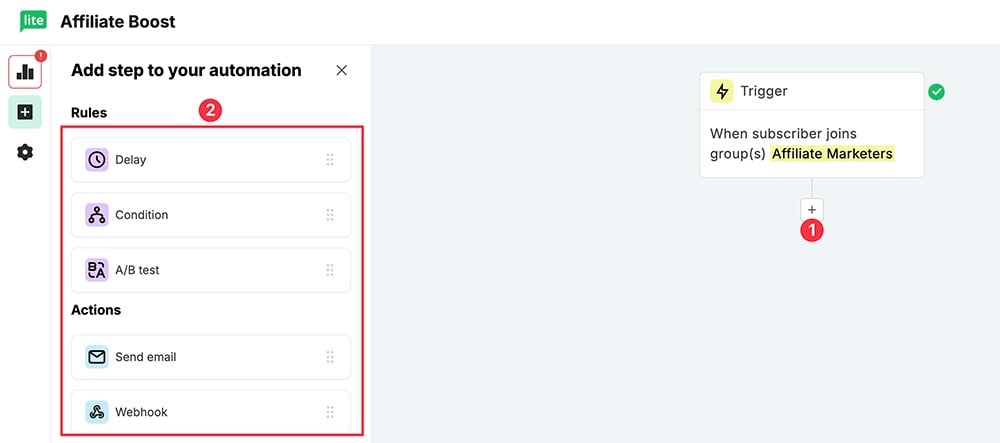
As you can see, there are several step types that you can add to your workflow. Such as Delay, A/B test, Condition, Send email, and so on.
Every step type has different setting options. For instance, if you are adding a Delay step, you can set the delay duration.
Adding Emails to the Workflow
Email is the main step type you should add to your email automation workflow. It is the medium that you can use to deliver your content.
To add an email to your workflow, you can simply drag the Send email step to the editor area.
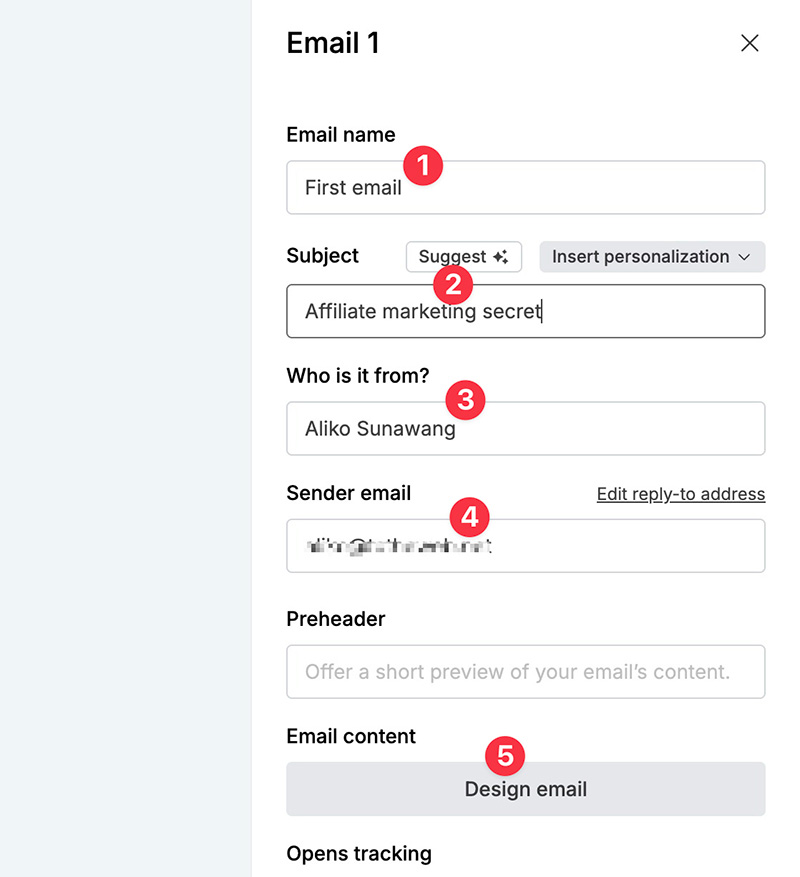
Once the step is in place, you can go to the settings panel to set the subject of your email, sender name and sender email address. You can also give your email a name for easier identification.
To write the content of the email, you can click the Design email button. You can add the content you have created earlier to your email.
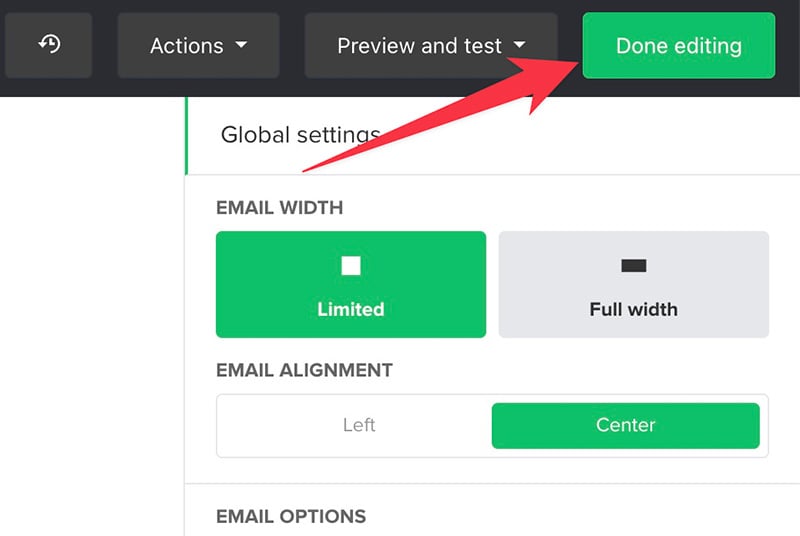
FYI. MailerLite has three editors. I personally prefer the Rich-text editor to write a heavy-text email, but you can also use the drag and drop editor if you want. It also has some elements to add texts.
Once you are done writing the email, you can click the Done editing button on the top-right corner to get back to the workflow editor.
You can add more email steps to your workflow according to your needs. If you want to add a delay between each email, simply add the Delay step and set the delay duration.
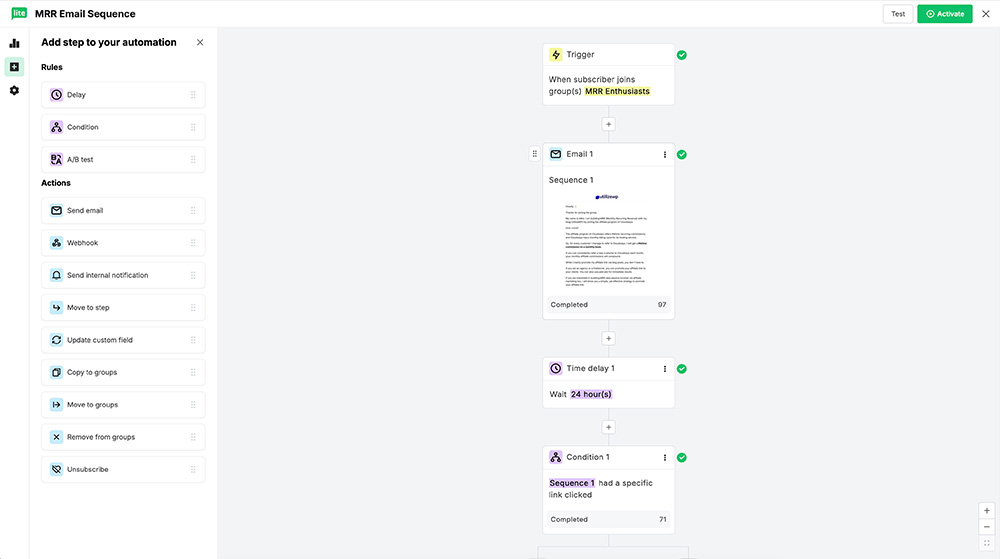
Here is an example of my email automation workflow.
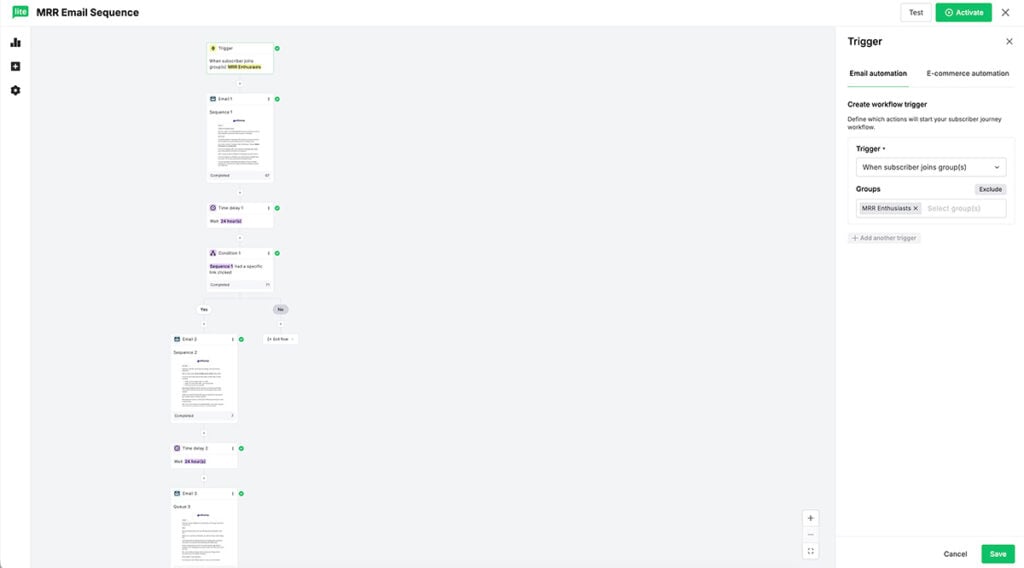
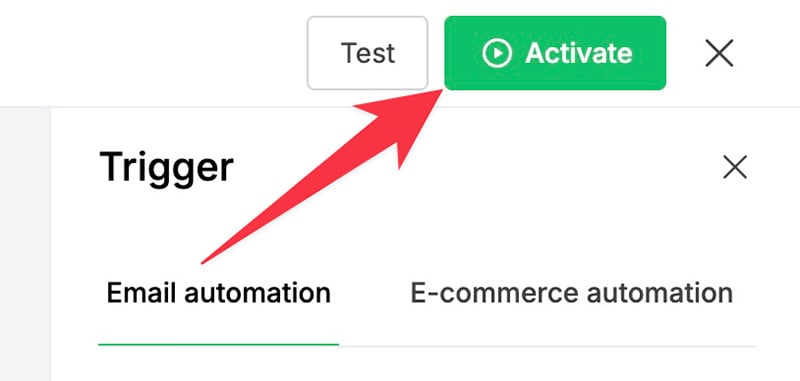
Once you are done creating the workflow, you can click the Activate button to activate the workflow.
If you want to edit the workflow you have just created, you can go to the Automations screen. A little note. You need to pause an active workflow to edit it.
And that’s how you can use email automation to boost your affiliate sales.
For maximum results, you can run A/B tests to find out which version of a certain element performs better. For instance, you can test two different email subjects to find out which one has a better open rate.
Summary
If you are struggling to boost your affiliate sales, you can try email automation. Unlike SEO and social media, email is a better marketing channel because you can add personalisation and control the workflow.
More importantly, you own the traffic and have full control over the content delivery with your email list.
Most email marketers fail because they overly rely on SEO and social media.
The biggest problem with SEO and social media is that you can’t control them. It’s true that they are free, but how long should you wait to get free traffic from SEO and social media?
Or, a more accurate question, will you get the traffic?
That’s the real problem. Without traffic, there will be no sales.
By using email automation, you only need to promote one thing: your squeeze page.
You can promote it on social media, your blog, or even paid channels like Meta Ads and Google Ads.
If you want to use paid ads to promote your squeeze page, make sure to calculate the ROI carefully.
If you truly want to use paid ads, I strongly recommend you to promote an affiliate product with recurring commissions. This way, no matter how much money you spend, you will end up being profitable after the break-even point.


