The main perk of building a website with WordPress is that you can make any tweak to your website thanks to its open source nature.
If necessary, you can even open and edit a certain file on your WordPress installation to make some changes.
There are at least three common ways to access a WordPress file if you want to edit it, which will be covered shortly below. You can choose the one according to the option available on your hosting service.
Shortcuts ⤵️
What is a WordPress File?
WordPress is an open source web building software. Meaning that the programming code that forms WordPress is available publicly and accessible by everyone. If you have programming knowledge, you can modify the source code regardless of your purpose.
The source code of WordPress spread in several files. On a WordPress installation (a website), they are put together under the main folder, which is called root folder/directory in the technical term.
All files and folders in the root folder are considered WordPress files.
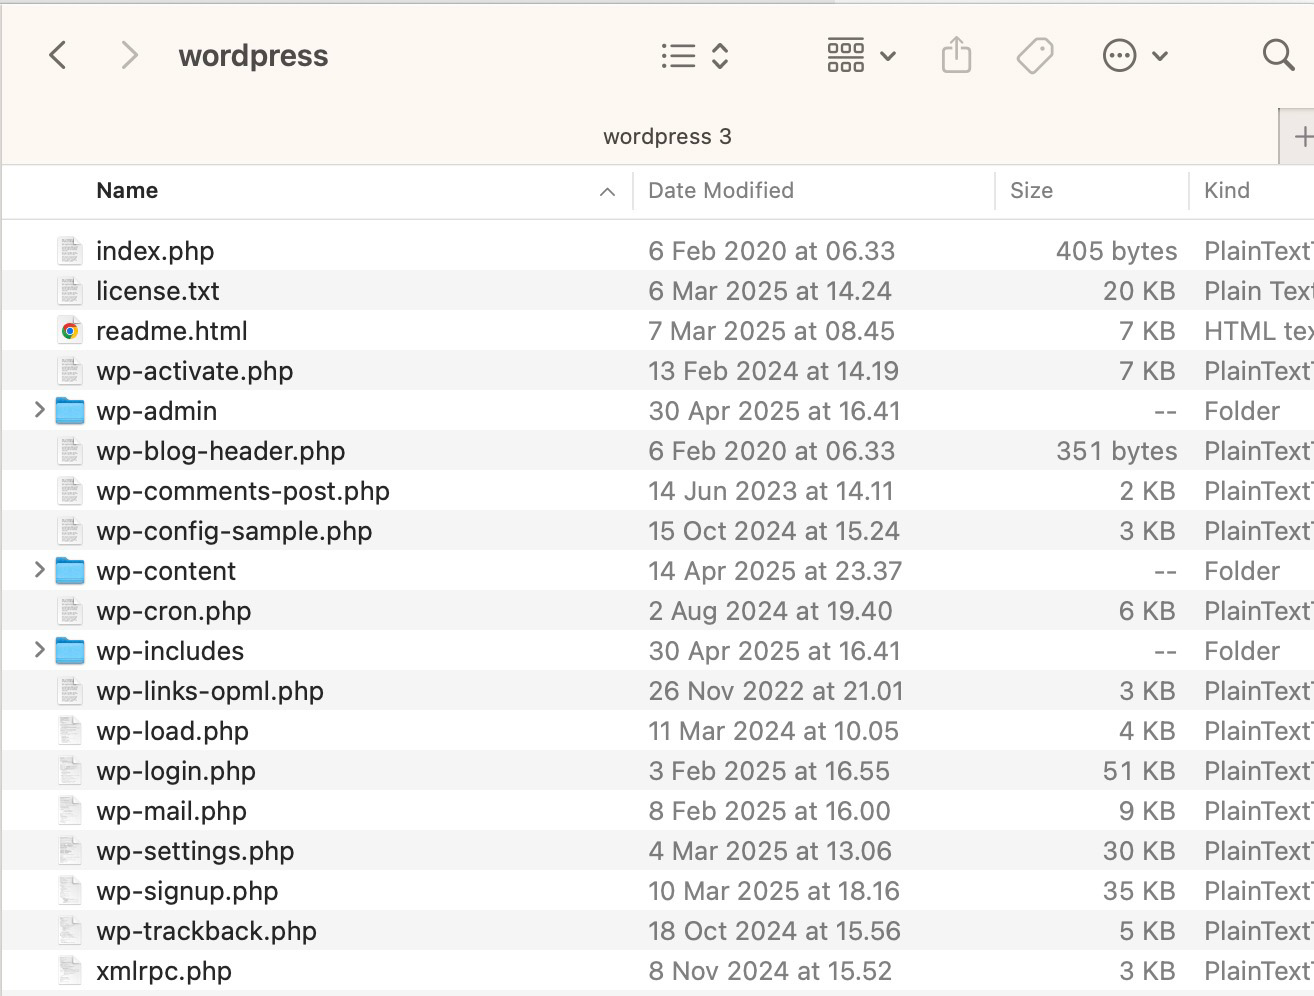
If you want to view the source code of WordPress, you can download the ZIP file of WordPress on its official website and unzip it on your computer.
Here is the list of the files and folders you will find after extracting the ZIP file of WordPress.
When Do You Need to Access a WordPress File?
You can add any feature or functionality to your WordPress website. In WordPress, there are two main approaches to add a new feature or functionality.
The first approach is via a plugin. The second one is via custom code.
In most cases, the second approach requires you to edit the functions.php file of your active theme.
While WordPress already has a built-in feature to edit a theme file to add a custom function, you might want to use a dedicated code editor like VS Code and the likes for an advanced editing. For this, you need to download the file first.
Another scenario where you need to access a WordPress file is when you want to edit the wp-config.php to add or edit a certain configuration.
3 Ways to Access WordPress Files
As I mentioned in the opening section, there are three common ways to access a file on your WordPress installation. You can choose the one according to the options offered by your hosting provider.
If your hosting provider offers a file manager feature, then you can use it to access your WordPress files. If all it offers is an FTP account, then you can use an application like FileZilla, Cyberduck or Transmit to access your WordPress files.
Here are 3 common ways to access files on your WordPress site installation:
Method 1: Via the Built-in File Manager of a Web Hosting
The easiest way to access WordPress files of your website is using the built-in file manager offered by a web hosting service. Unfortunately, not all hosting services offer this feature.
Especially managed hosting services that target advanced WordPress users like Kinsta, WP Engine and Pressable.
Even so, some managed hosting services still offer the feature to make it easy for their customers to access WordPress files.
Two examples of managed hosting services that offer built-in file manage feature are:
Accessing WordPress Files in Rocket.net
If you use Rocket.net for your WordPress websites, then you can access the WordPress files instantly via its built-in manager.
The file manager feature Rocket.net comes with a simple text editor which is useful to make minor changes to a certain file.
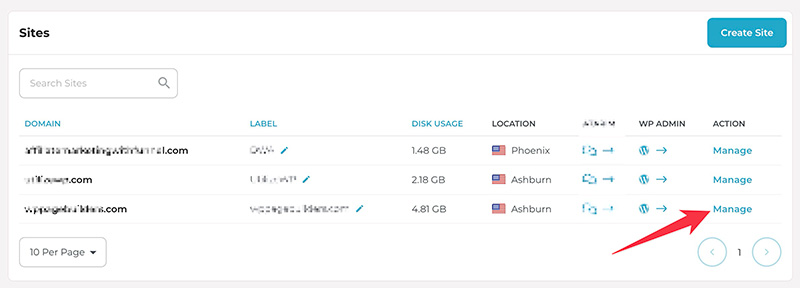
To access WordPress files in Rocket.net using its built-in file manager, first, login to Rocket.net with your account and click Manage on the website you want to access the files of.
You will be taken to the control panel where you can manage your website. You can simply click the File Manager menu to access the files of your website.

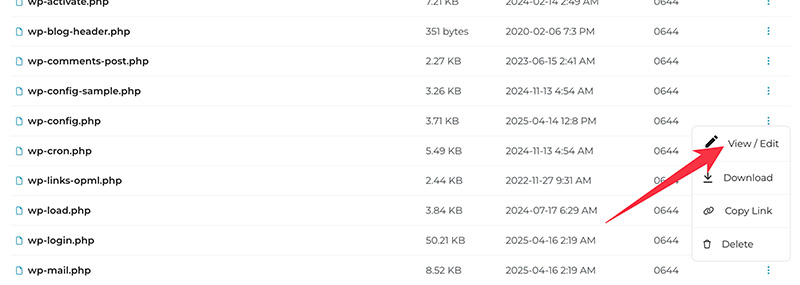
If you want to edit a certain file, you can simply click it. This will open up the text editor. Or, you can also click the three-dot icon on the file you want to edit select View/Edit.
What about Rapyd Cloud?
You can simply login to Rapyd Cloud with your account and select the website you want to access the files of and click the File Manager menu.
Unlike Rocket.net’s file manager, Rapyd Cloud’s file manager offers more actions. Apart from viewing/editing the content file, you can also move the file, rename it, or duplicate it.

Pros and Cons of Accessing WordPress Files via Hosting Built-in File Manager
| Pros | Cons |
|---|---|
| Instant access | Limited action options to organize files |
| No plugin needed | Limited text editing capability |
| No extra configuration needed | |
| Great to make minor changes to a file |
Method 2: Via FTP/SFTP
If your hosting service doesn’t offer a built-in file manager, you can use FTP/SFTP to access your WordPress files. Today’s web hosting services come with this feature.
If a hosting service doesn’t offer this feature, you should not use it.
To be able to access your WordPress files using FTP/SFTP, you need to install an FTP client application on your computer. Some FTP client applications you can use are:
- FileZilla (macOS, Windows and Linux)
- WinSCP (Windows)
- Cyberduck (macOS and Windows)
- Transmit (macOS)
In this post, I will show you how to access your WordPress files via FTP/SFTP using FileZilla.
Accessing WordPress Files via FTP/SFTP Using FileZilla
You can download FileZilla on its official website.
Make sure to download the FileZilla version according to the operating system you use. Install it once you have downloaded it.
Once installed, you can launch FileZilla to start using it.
To use FileZilla (or other FTP client applications), you need the following information from your server:
- Hostname or IP address
- FTP username
- FTP password
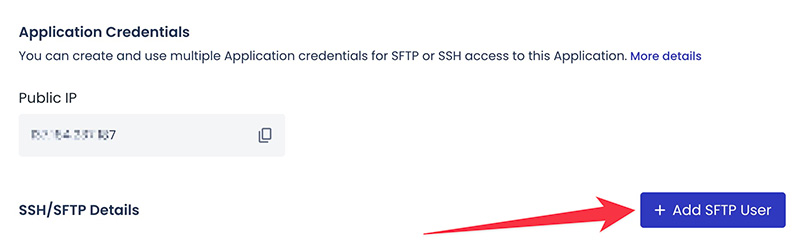
You can use the default FTP account provided by your hosting service or create a new one.
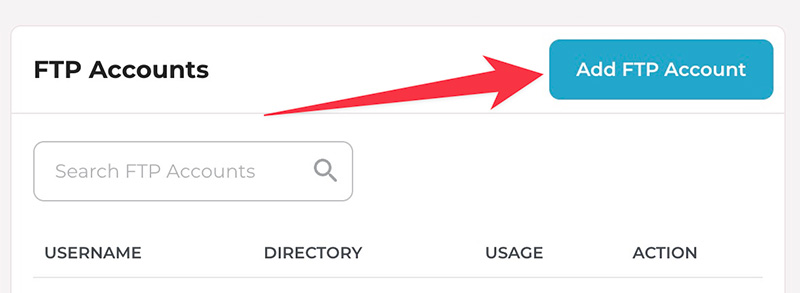
In Rocket.net, you can create a new FTP account from the Overview menu.
If you use Cloudways, you can create a new FTP account from the Access Details menu on the application control panel.
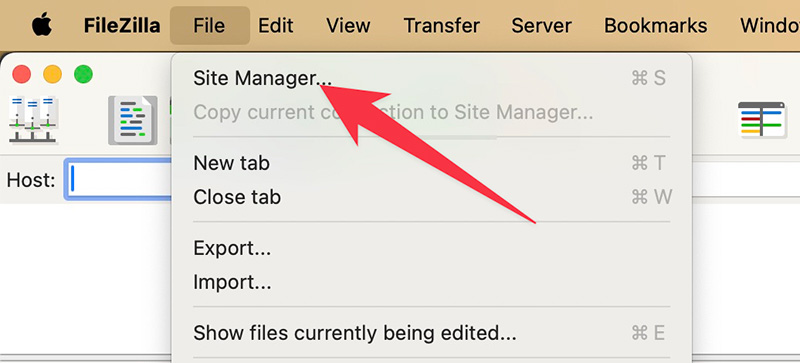
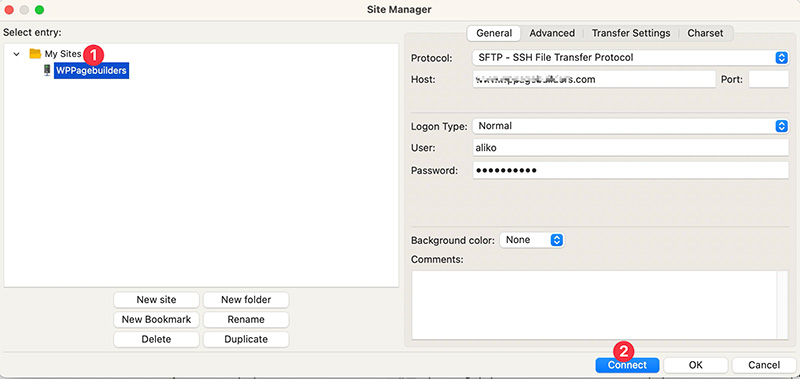
Once your FTP account is ready, go to the FileZilla window and go to File -> Site Manager.
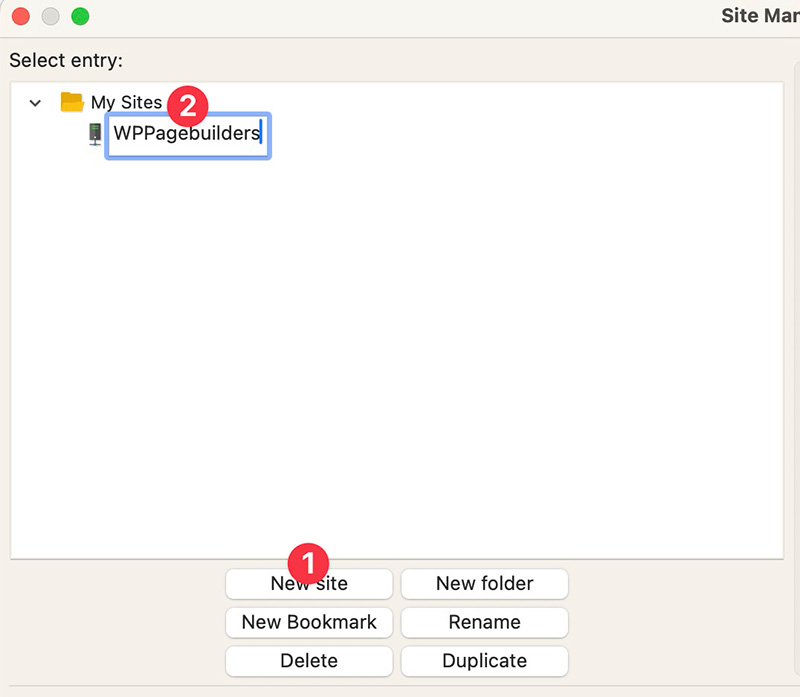
On the appearing window, click the New site button and give it a name.
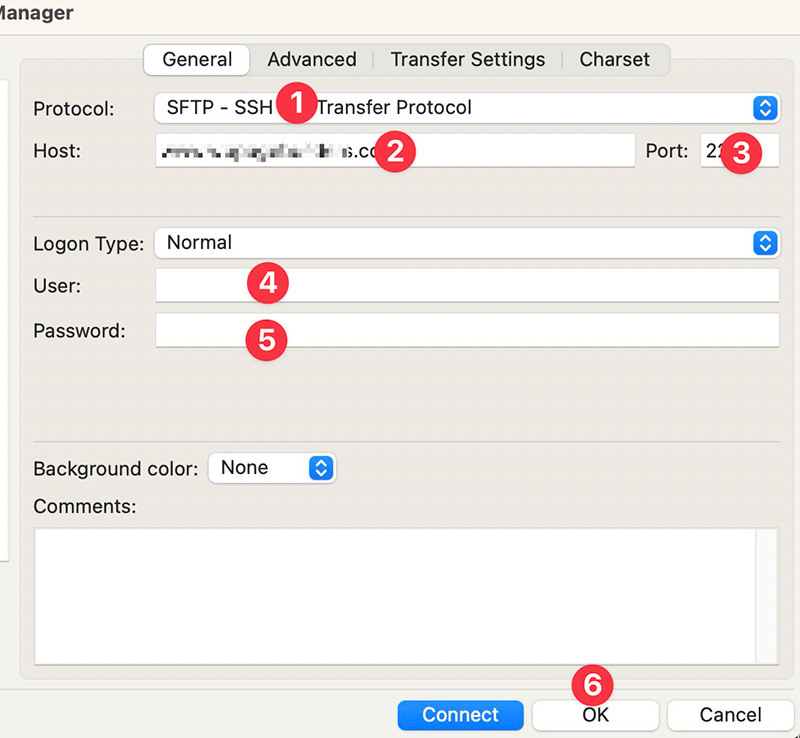
Still on the same window, switch to the right column to set the protocol, host, user name and password.
On the Protocol field, you can set according to the protocol provided by your hosting service (FTP or SFTP). On the Host field, you can type the IP address or your hostname (your site domain name).
If your protocol is FTP, you can type 21 on the Port field. If your protocol is SFTP, you can type 22.
On the Encryption and Login Type fields, you can leave them default. Type the FTP username and password on the User and Password fields and click the OK button.
Once your site is added, you can go to File -> Site Manager every time you want to access your remote files. Select your site from the sites list and click the Connect button to connect to the server.
Once connected to your server, you can find your remote files (the files on your server) on the right column on the FileZilla interface and local files (the files on your computer) on the left column.
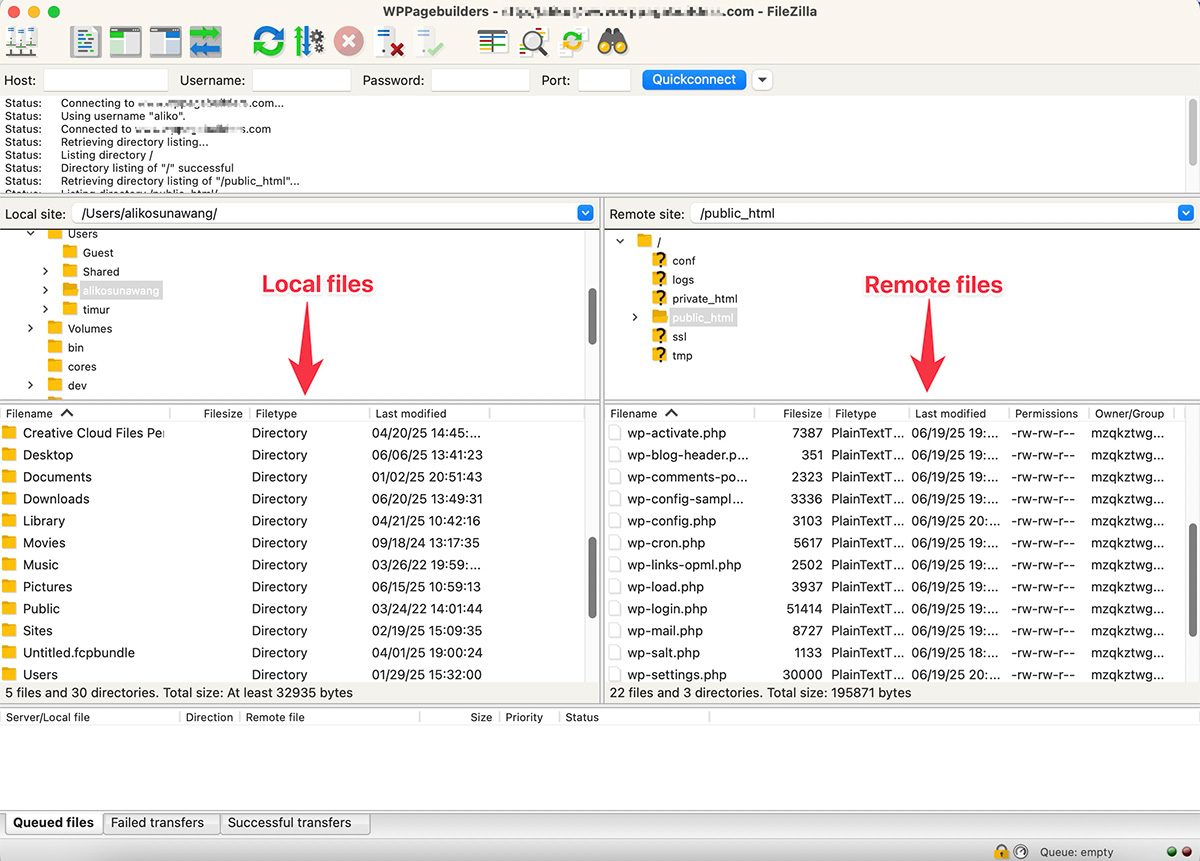
To download a file from your server, you can simply drag it from the right column to one of the local folders on the left column.
Similarly, to upload a file to a server, simply drag it from the left column to the right column.
Pros and Cons of Accessing WordPress Files via FTP/SFTP
| Pros | Cons |
|---|---|
| More action options to organize files | Requires extra steps |
| Applicable on nearly all hosting services | Not friendly enough for beginners |
| Great for a backup purpose |
Method 3: Via a File Manager Plugin
Another method to access a WordPress file is via a file manager plugin. This is the easiest way for beginners.
Some plugins that you can use for this particular purpose are:
In this post, I will demonstrate how to access WordPress files using a plugin called WP File Manager.
Accessing WordPress Files Using the WP File Manager Plugin
To be able to use the WP File Manager plugin to access your WordPress files, you definitely need to install it on your WordPress site first.
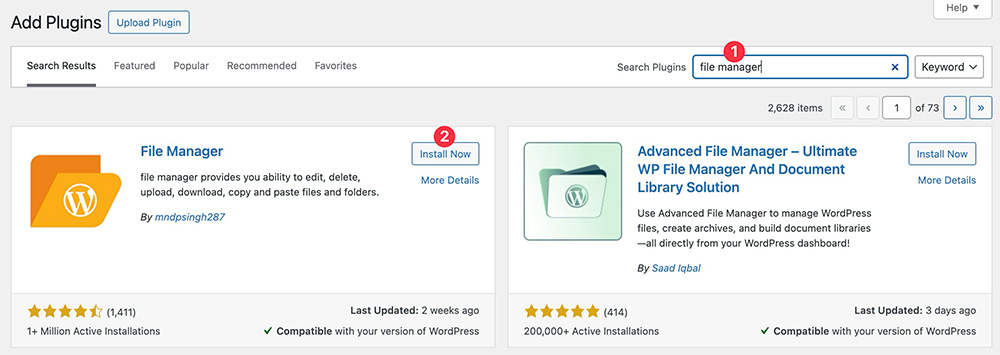
Simply go to Plugins -> Add New on your WordPress dashboard to install a new plugin. Type “file manager” on the search box and hit enter. Click the Install Now button to install it.
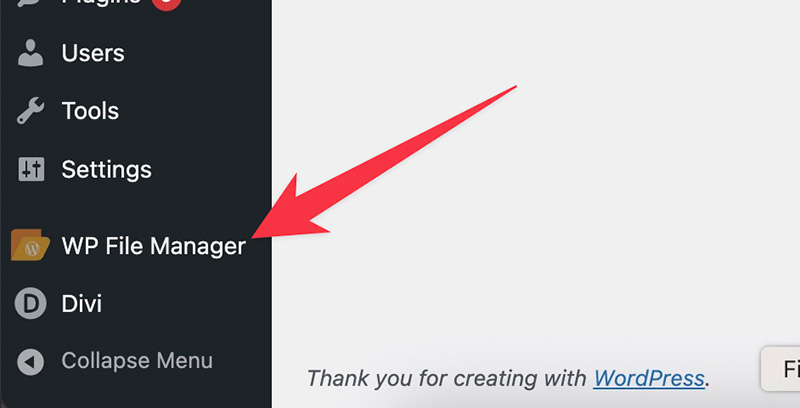
Activate the plugin right away once installed. You will find a new menu item called WP File Manager on your WordPress dashboard after activating the plugin.
Simply click it to launch the file manager.
The file manager interface will show up after you click the WP File Manager menu. From here, you can access your WordPress files and manage them.
A simple text editor is also available to allow you to make minor changes to a certain file.

The WP File Manager plugin offers many action options to organize your files. You can access them via the icon bar above the files area. It also supports right-click for easier file organization.
Pros and Cons of Accessing WordPress Files via a Plugin
| Pros | Cons |
|---|---|
| Doesn’t require complex setup | Not reliable enough for a backup purpose |
| More friendly for beginners | Limited text editing capability |
| More action options to organize files | |
| Great to make minor changes to a file |
Summary
WordPress is an open source software. You can access the code no matter your purpose. On a WordPress site installation, you can access the WordPress files according to file access feature available on your hosting service.
In general, there are three ways to access a WordPress file on your website:
- Via the built-in file manager of your hosting service
- Via FTP/SFTP
- Via a file manager plugin
Accessing WordPress files using the built-in file manager of web hosting is the easiest way, but not all hosting services offer this feature.
If you want to perform a backup, accessing WordPress files via FTP/SFTP is more recommended because FTP is an internet protocol designed specifically for file transfer.
If you are a beginner and are not familiar with FTP yet, you can install a file manager plugin I mentioned above. This is the most beginner friendly method to access WordPress files.


