MailerLite is an email marketing platform which has an automation feature. If you have a WooCommerce-based online store, integrating it with MailerLite allows you to run some email automation campaigns to boost sales.
In this post, I will show you how to integrate MailerLite with WooCommerce. I will also show you how to set up an email automation workflow after they are integrated.
Integrating MailerLite with WooCommerce is extremely easy because MailerLite provides an official plugin that you can use for this matter.
Before you start the integration, let’s find out what you can do with the integration.
Shortcuts ⤵️
- What can you do with the integration?
- Integrating MailerLite with WooCommerce
- Creating an automation workflow
- Summary
What Can You Do with MailerLite and WooCommerce Integration?
As I mentioned in the opening section. MailerLite is an email marketing platform that comes with an automation feature. The feature is available for free, making it a great solution if you are new to email automation.
You can use the MailerLite automation feature to run email automation campaigns for WooCommerce for a wide range of purposes.
For instance, you can run an automation campaign to automatically send a product recommendation from the same category of the product that has just been bought by your customers.
Another example. You can automatically send a reminder over an abandoned cart, which can boost the checkout rate.
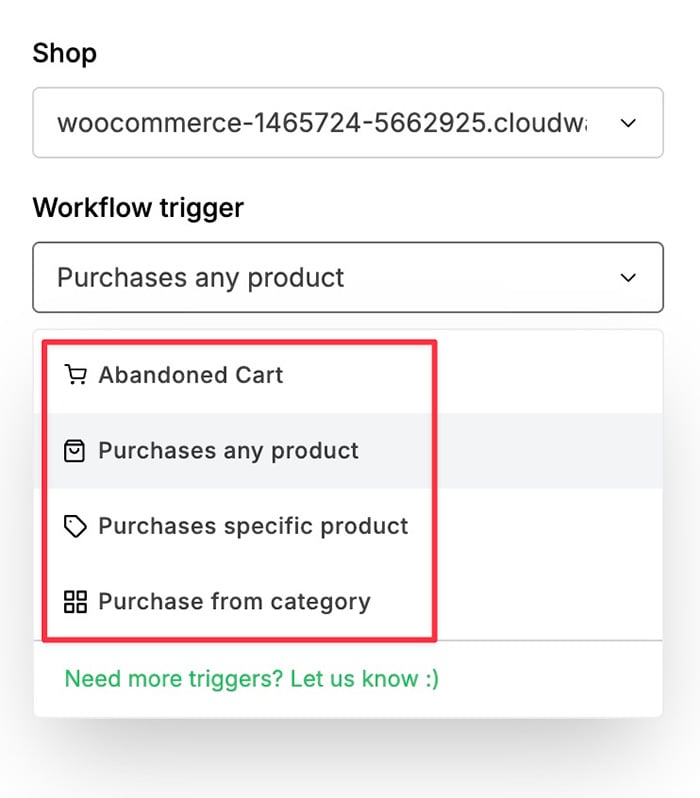
There are four email automation trigger types that MailerLite supports:
- Abandoned cart
- After purchasing a product (any product)
- After purchasing a specific product
- After purchasing a product from a specific category
MailerLite is Not an Email Transactional Email Service
While MailerLite offers an email automation feature, it doesn’t offer a transactional email feature. This means, you can’t use it to send emails related to the buying process.
Such as order details and payment confirmation.
If you want to use an external service to send WooCommerce transactional emails, you can use MailerSend, a sister product of MailerLite.
Same as MailerLite, you can also use MailerSend for free although limitations apply.
Integrating MailerLite with WooCommerce
MailerLite provides an official plugin to make it easy to integrate its service with WooCommerce. But before you install the plugin, you need to create an API key first.
You will need the API key to integrate the two platforms.
Here are the steps to integrate MailerLite with WooCommerce:
— Step 1: Create an API Key and Copy It
To create an API key in MailerLite, first, login to MailerLite with your account.
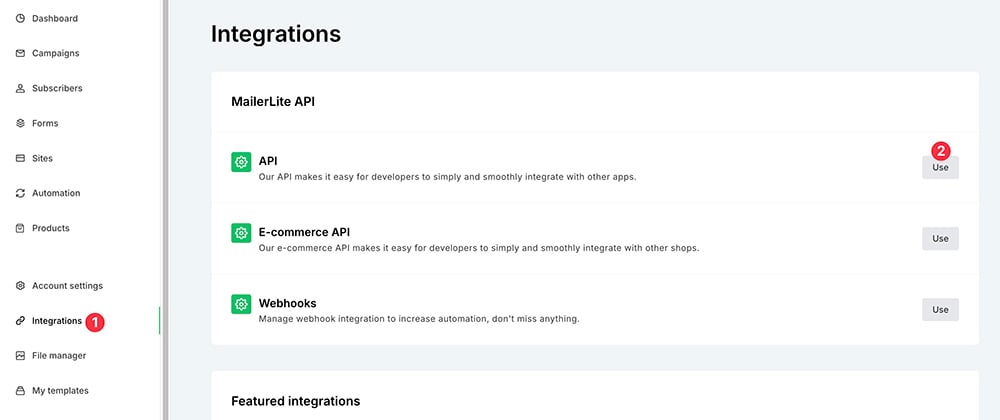
Once logged in, go to the Integrations menu on the MailerLite dashboard and click the Use button on the API section.
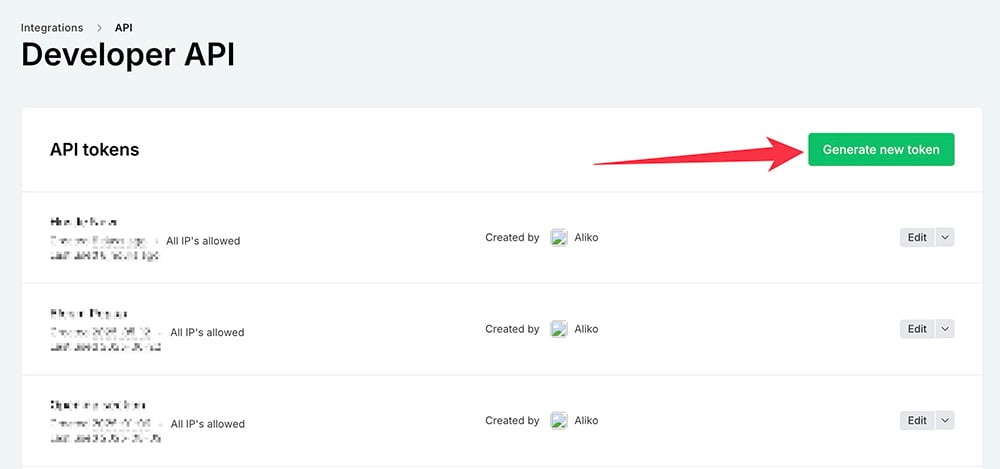
You will be taken to the Developer API screen after clicking the button above. Click the Generate new token to create a new API key.
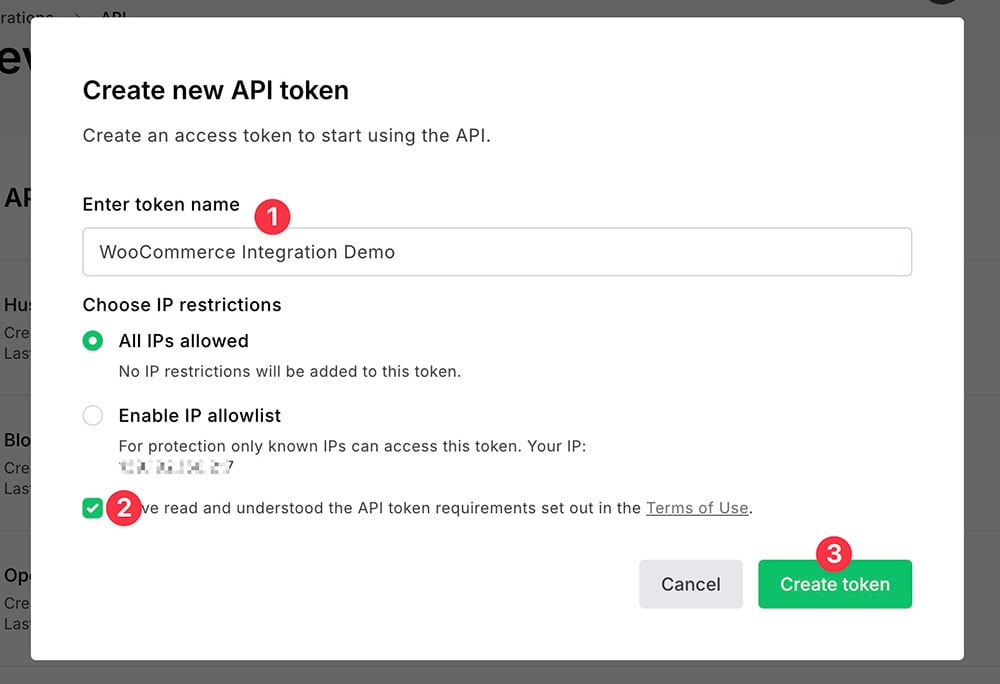
Give your API key a name and accept the ToS. Click the Create token button and you will be presented with the API key.
Copy the generated API key.
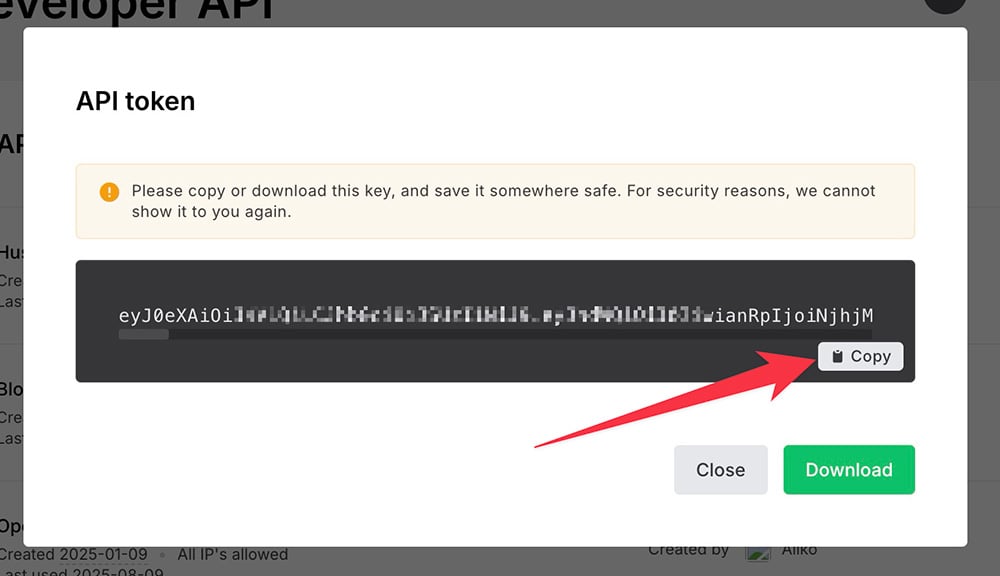
For a security reason, MailerLite only displays the API key once. So, save it carefully.
If you use a password manager (e.g. LastPass) and it has a feature to add a note, you can utilize it.
For now, you can temporarily store/paste the API key to the text editor provided by your operating system (TextEdit on macOS, Notepad on Windows, Text Editor on Ubuntu, etc.)
— Step 2: Add the API Key to the MailerLite Plugin
Step 1 is done. You can now move on to step 2: adding the API key to the MailerLite plugin.
Of course, you need to install the MailerLite plugin before you can continue.
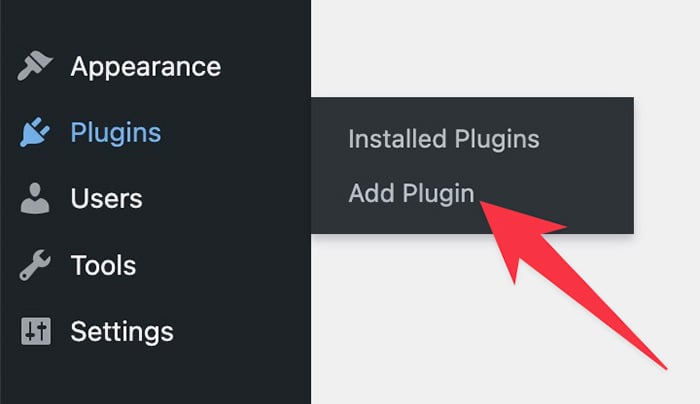
To do so, login to your WordPress dashboard and go to Plugins -> Add Plugin.
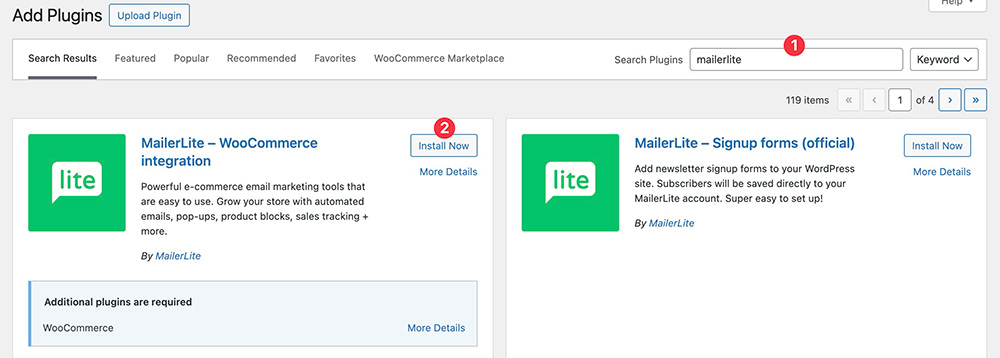
Type “mailerlite” on the search box to find the MailerLite plugin.
Fyi. There are two official WordPress plugins from MailerLite. The one you need for WooCommerce integration is the Mailerlite – WooCommerce integration one.
Click the Install Now button to install the plugin.
Activate the plugin right away once installed.

Once the plugin is active, you should see a new sub-menu item called MailerLite under the WooCommerce menu on the WordPress menu panel. Click on it.
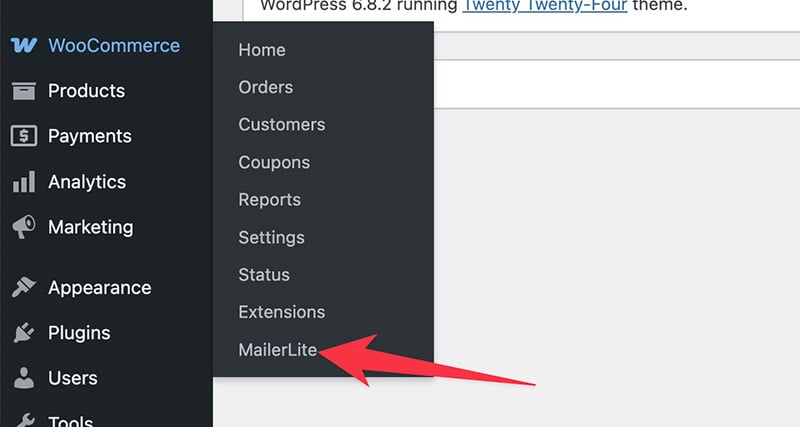
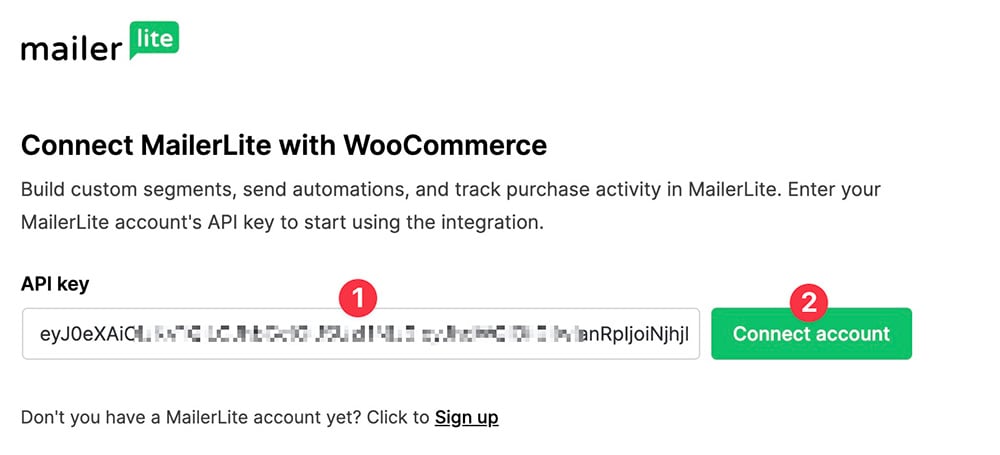
Paste the API key you created on step one above to the API key field click the Connect account button.
Select a group where you want to add your WooCommerce customers to. Select the fields you want to sync and click the Next button.
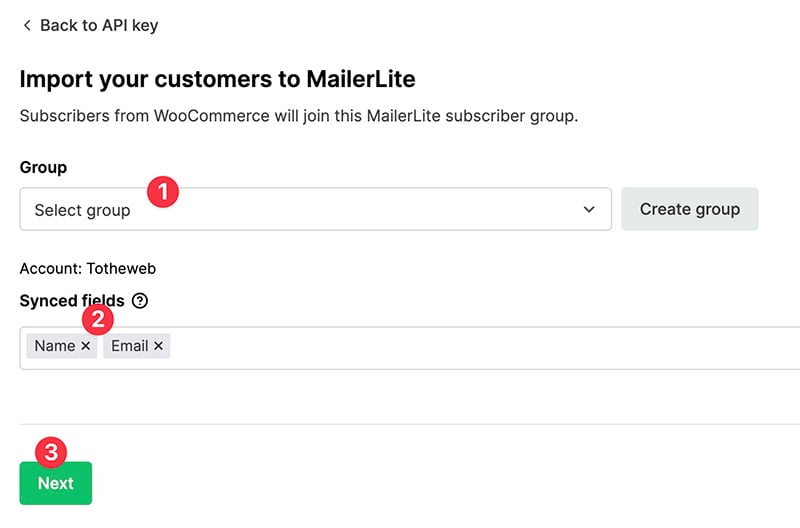
If you want to create a new group instead of selecting from an existing group, you can simply click the Create group button.
Click the Synchronize untracked resources to sync your subscribers data.
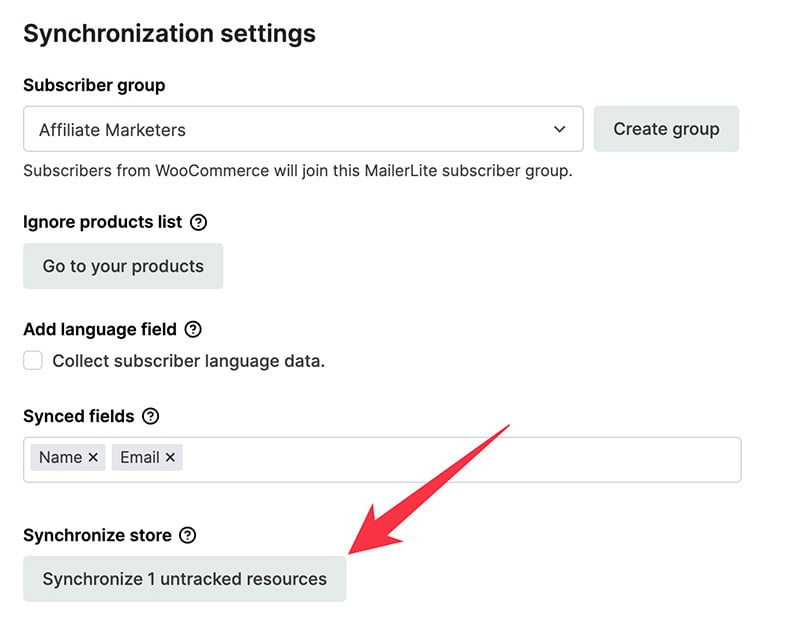
Click the Save changes button to save the changes.
Your WooCommerce is not integrated with your MailerLite account. Next, you can start to create an automation workflow.
Creating an Automation Workflow
Your WooCommerce has been integrated with your MailerLite account. Now, you can create an email automation workflow according to your goal.
There are four automation trigger types that MailerLite supports, fewer compared to Mailchimp. But MailerLite is way cheaper.
In this example, I will demonstrate how to create an automation workflow to automatically send an email reminder to those who have added products to the shopping cart but forgot to make the payment.
Creating an Abandoned Cart Reminder Workflow in MailerLite
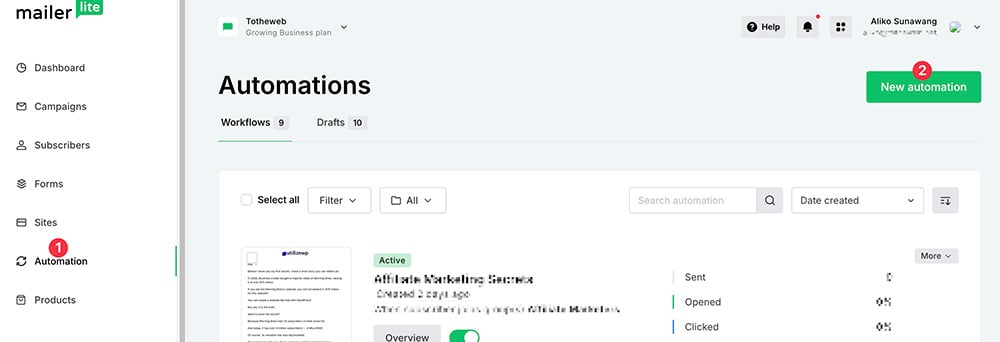
First, login to MailerLite. Once logged in, go to the Automation menu and click the New automation button.
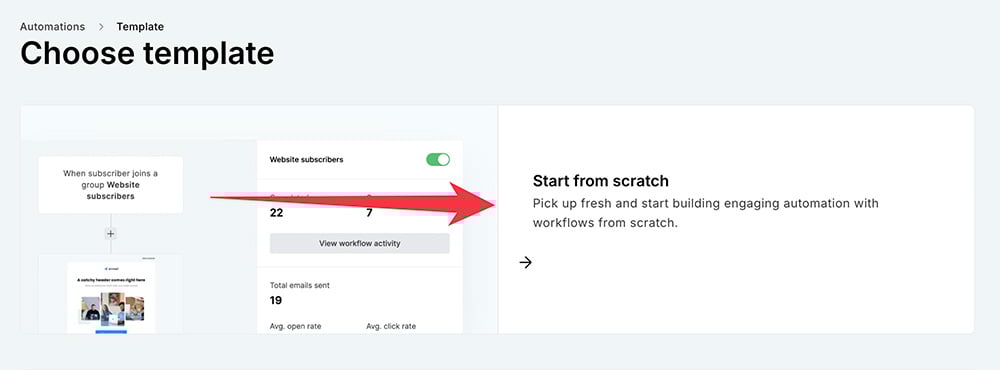
On the next screen, select how you will create your automation workflow. There are two options you can choose from: from a pre-made template and from scratch.
If you prefer to create the workflow from scratch, you can simply select Start from scratch.
Conversely, if you want to create the automation workflow from a template, you can simply click the Abandoned cart option.

To give you a clearer understanding of how the abandoned cart workflow works, I will show you to create the automation workflow from scratch.
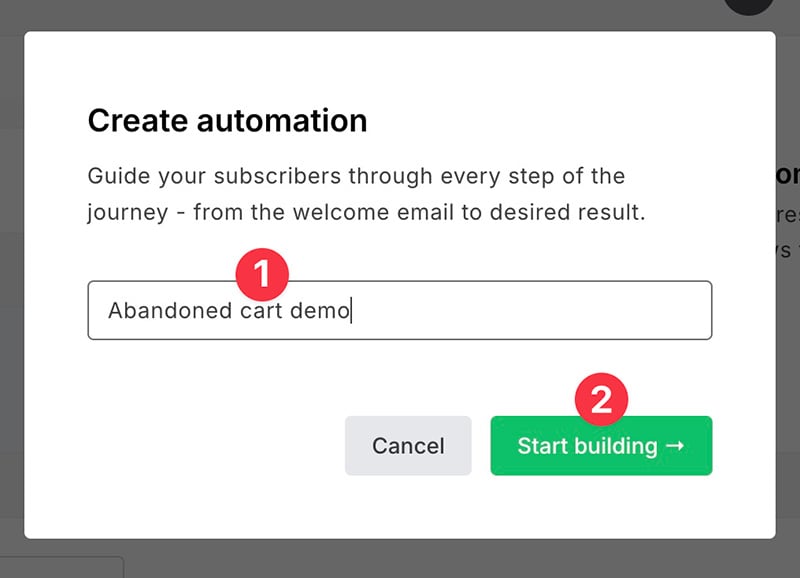
You can click the Start from scratch option. Give your automation a name on the appearing popup. Click Start building.
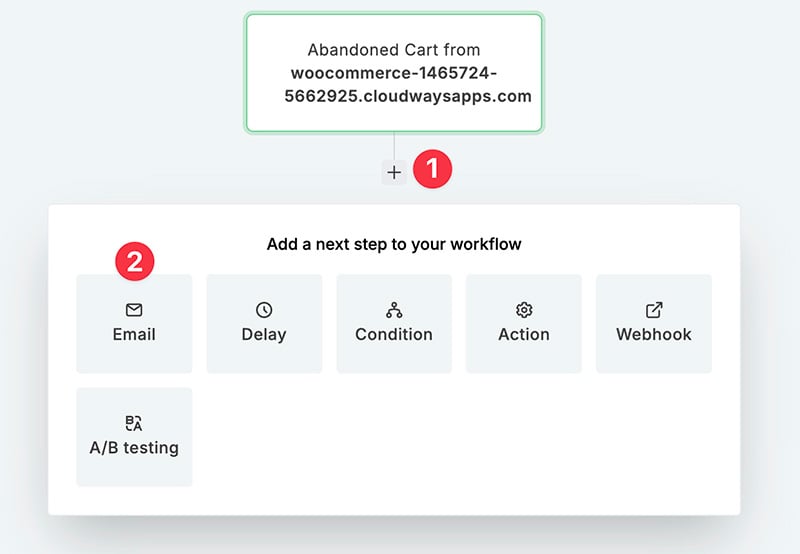
You will be taken to the automation editor after clicking the button above. Before adding a step (a workflow element is called step), you need to set the trigger first.
To do so, go to the settings panel on the right side. Open the E-commerce automation tab and select your WooCommerce store. You will only see your WooCommerce store on the list after integrating it with your MailerLite.
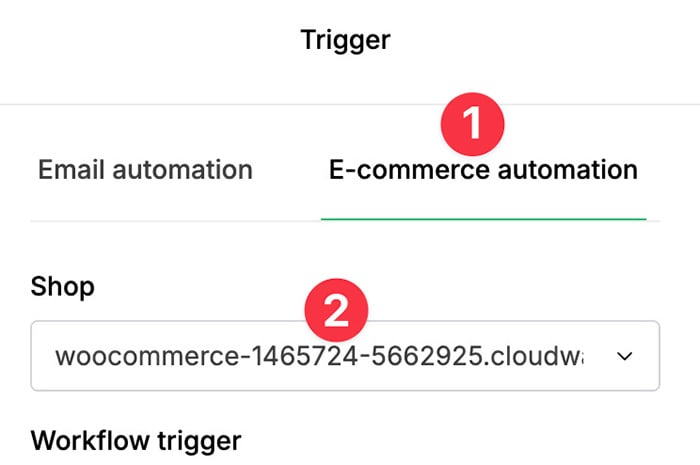
On the Workflow trigger section, you can select Abandoned Cart and set the delay duration before the email reminder is sent to your customers. Click the Save button.
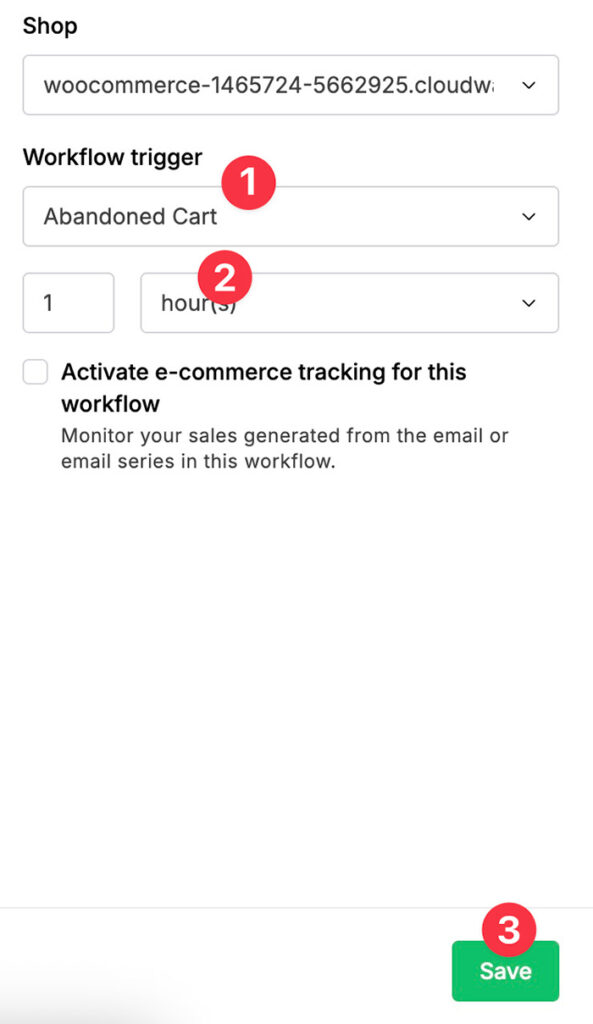
Next, click the plus icon on the canvas area and select Email.
Give your email a name (an identifier on your end) and add the subject (email subject). Also set the email sender and sender name. Click the Save button.
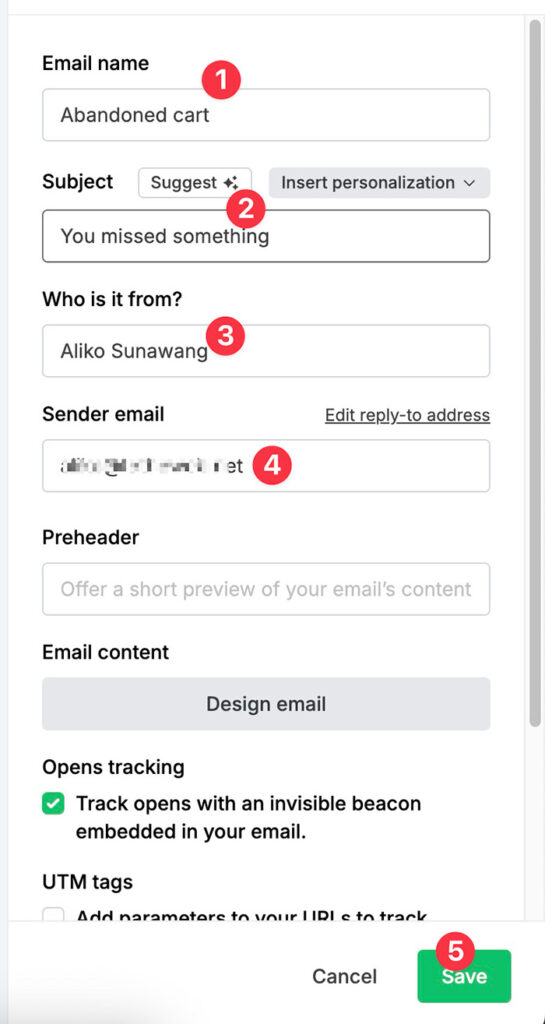
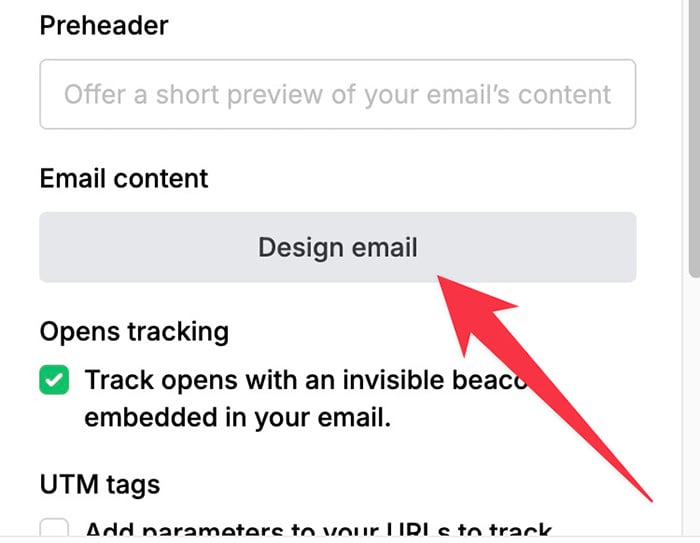
To edit the email content, you can click the Design email button.
Choose how you will create the email content. Whether from a premade template or from scratch.
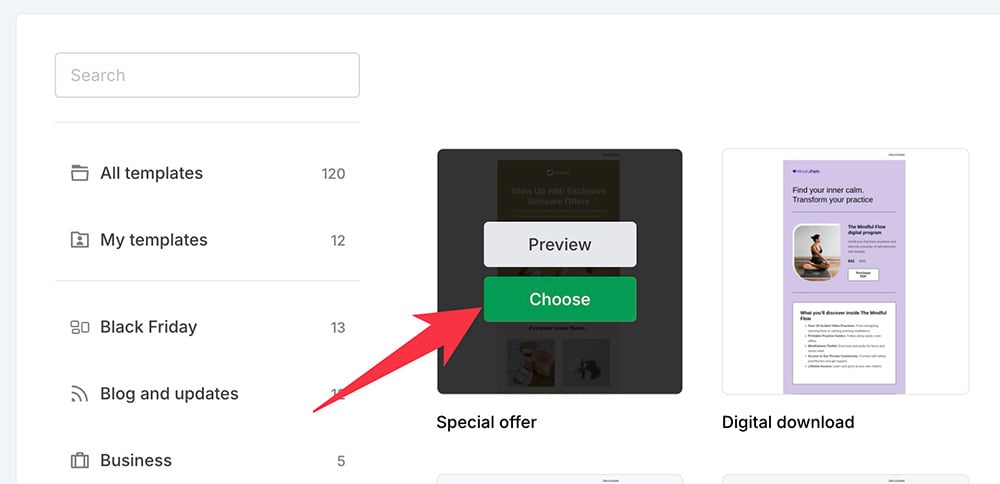
If you want to create the email from scratch, you can simply select the Start from scratch option.
If you prefer to create the email from a premade template, simply select a template you like and click the Choose button.
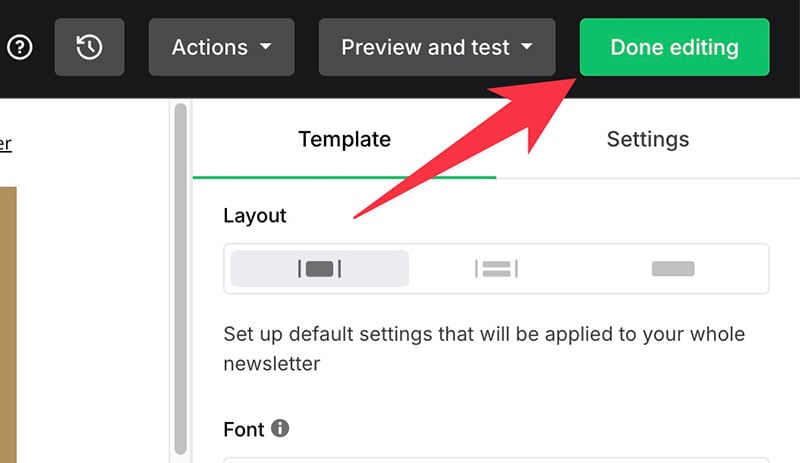
Once you are done editing the email content, you can click the Done editing button at the top-right corner. Clicking the button will take you back to the automation editor.
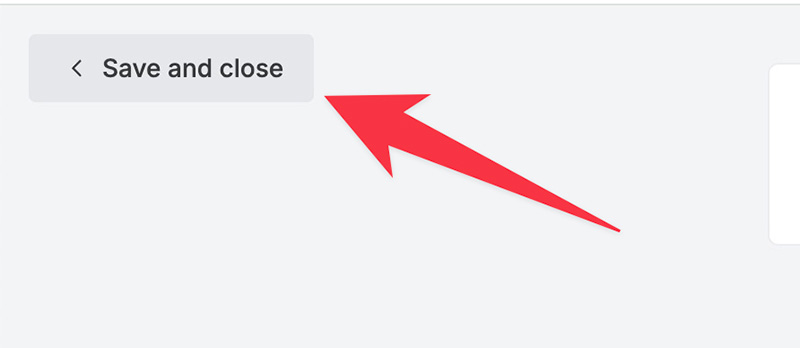
Once you are back on the workflow editor, you can click the Save button once again to save the changes. Click the Save and close button at the top-left corner to exit the workflow editor.
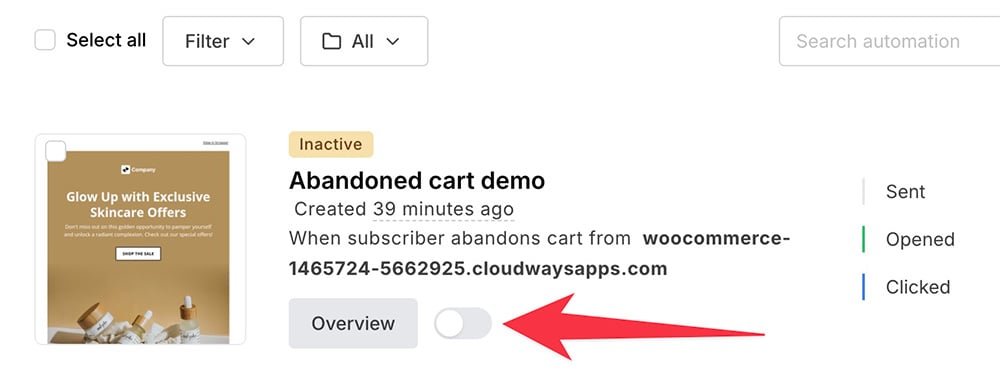
Lastly, you can toggle the switch to activate the automation.
And that’s how you can integrate WooCommerce with MailerLite. Easy. Right? No need to deal with code.
📝 Summary
WooCommerce and MailerLite are two popular platforms in their respective areas. WooCommerce is a popular e-commerce builder platform, while MailerLite is a popular email marketing platform.
You can integrate the two to take your online store to the next level. Without email automation, you miss a huge chance to boost sales in your store.
The WooCommerce and MalerLite integration allows you to:
- Automatically send an email reminder over abandoned cart
- Automatically send an email after a customer buy a product (any product)
- Automatically send an email after a customer buy a specific product
- Automatically send an email after a customer buy a product from a specific category
MailerLite provides an official plugin to make it easy for you to integrate your WooCommerce-powered online store.