So, you have just finished creating a new WordPress website. But after testing its performance, you don’t get a decent score on GTmetrix or PageSpeed Insights. Turns out, images are the culprits causing the performance issue and you want to optimize them.
There are several ways to optimize the images on a WordPress website. One of which is by preloading them.
But which images should you preload? What about the preload mechanism? Should you do it manually or using a plugin?
You will find the answer to the above questions shortly in this post.
Shortcuts ⤵️
- What is preload?
- When should you preload an image?
- Preloading static images
- Preloading featured image
- Testing the results
- Summary
What is Preload?
First, you need to know that preload is not a WordPress feature. Instead, it is an HTML feature. This means, if your website is created with a platform other than WordPress, you can also use preload to optimize the images.
So, what is preload?
Preload is one of the values you can add to a <link> element of HTML. It acts as a resource hint to instruct a web browser to start downloading a certain resource early in the page load process.
You can add the value to the rel attribute within a <link> element.
One of the resources that preload value supports is image. Other than image, preload also supports the following resource types:
- Font
- Script (JavaScript file)
- Style (CSS file)
- Track (WebVTT file)
To preload an image itself, you can add the following line.
<link rel="preload" as="image" href="resource_URL"/>Simply replace resource_URL with the actual URL of the image you want to preload.
But how to apply the above line in WordPress? I will show you shortly.
When Should You Preload an Image?
Basically, when you add a preload value to a <link> element, you tell web browsers to prioritize the request made by the element.
And, since the request is prioritized, it will be processed sooner than other elements within the page. As a result, the element will be presented sooner than other elements.
Ideally, you preload images that have a large file size. Like a hero image or a background image.
The best practice of preloading images is that you preload all above the fold images (all visible images before page scroll).
Just because you can preload the resources of your website, it doesn’t mean you can preload everything.
Preloading too many resources will make them (the resources) to compete for bandwidth. This results in slower page load instead of faster.
As I said above, the best practice is to preload above the fold resources.
Preloading Images in WordPress
There are two image types in WordPress in general: static image and dynamic image. Featured image is an example of dynamic image in WordPress.
Preloading a static image is way easier because you only have a single, static image URL to be added to the <link> element.
The real challenge is to preload the featured image because you have multiple image URLs to be added to the <link> element.
But no worries. This post will show you how to preload both image types in WordPress.
— Preloading Static Images
You already know the line you need to add to preload an image but you don’t know how to add the line in WordPress.
Well, here is how.
First, you need to find out whether your theme has a feature to add a custom code to the <head> section of your website. If it has one, you can use it to add the line.
Divi is an example of a theme that has this feature.
# Adding the Line in Divi
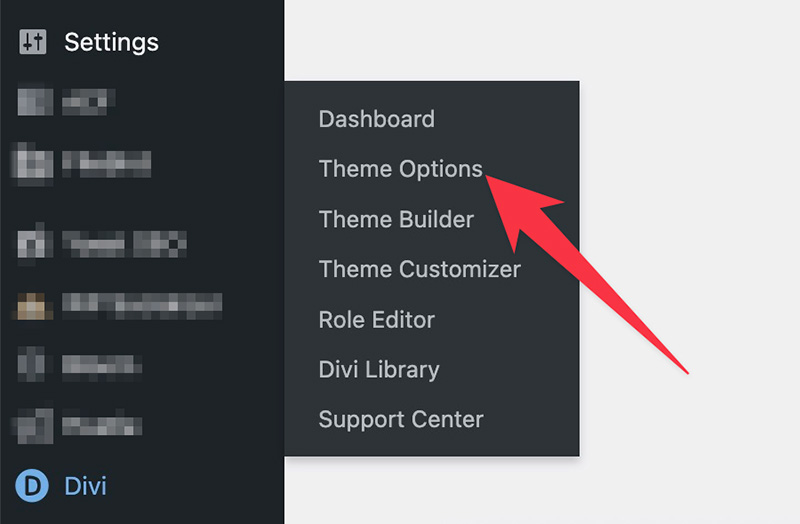
You can access the feature from the Theme Options screen.
First, login to your WordPress dashboard and go to Divi -> Theme Options.
On the Theme Options screen, go to the Integration tab and paste the line to the Add code to the < head > of your blog field.
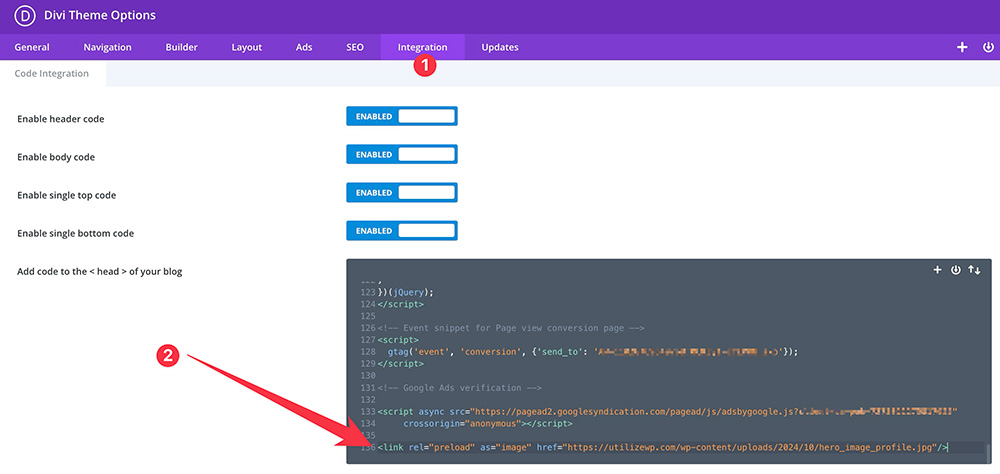
Scroll down to the bottom and click the Save changes button to apply the changes.
If you want to preload another image, simply add a new line and replace the image URL with the new image URL that you want to preload.
# Adding the Line in Other Themes
If you are not a Divi user and your theme has no feature to add custom code, you need to edit the functions.php file to add a new custom function to insert HTML code.
To do so, go to Appearance -> Theme File Editor on your WordPress dashboard.
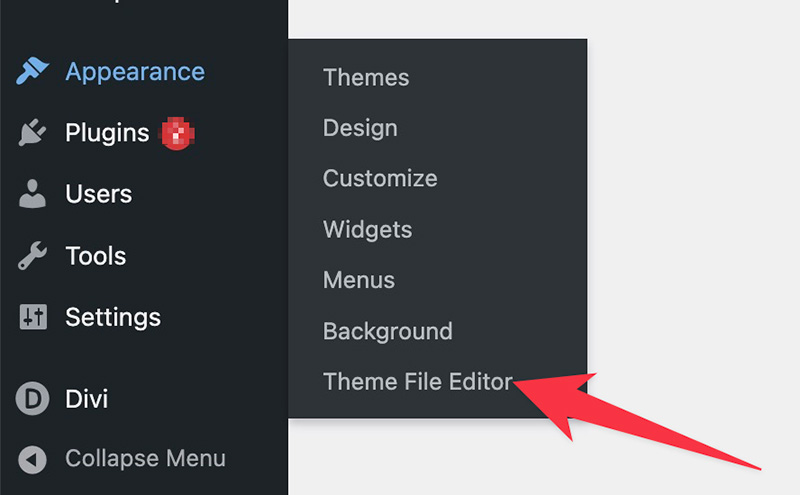
🚨 If you use a block theme, you can find Theme File Editor under the Tools menu.
Select the functions.php file on the Theme Files panel to edit it.
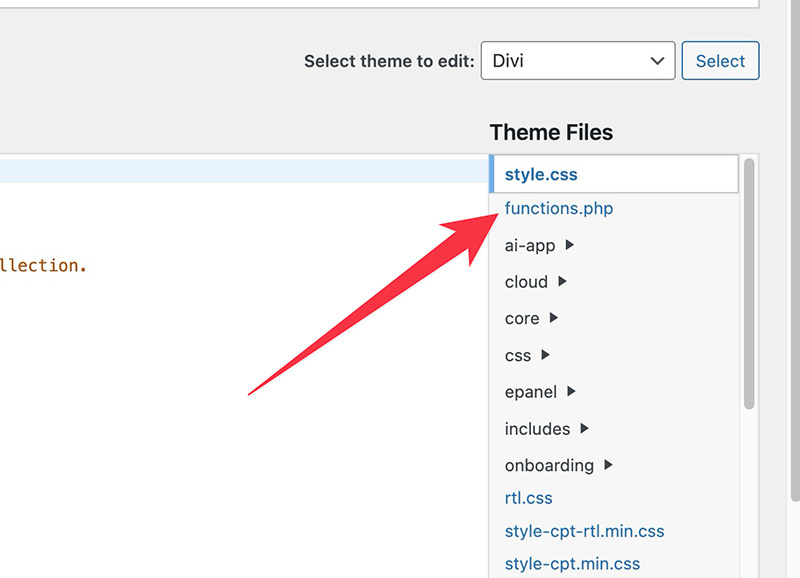
Add the following code snippet right after the last line of the functions.php file content. Make sure to replace resource_URL with the actual URL of the image that you want to preload.
function wpp_preloadimages() {
  echo '
  <link rel="preload" as="image" href="resource_URL" />
  <link rel="preload" as="image" href="resource_URL" />
  ';
}
add_action( 'wp_head', 'wpp_preloadimages' );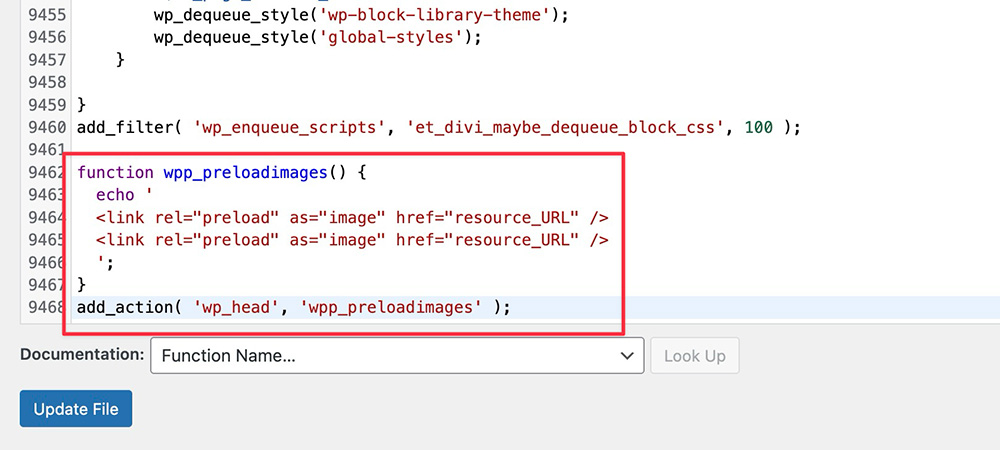
The above code has two lines to preload two images. If you only need to preload one image, you can simply remove the unused line.
Similarly, if you want to preload more images, you can simply add new lines and tailor the image URL.
Don’t forget to click the Update File to apply the code to your site.
A little note. Adding a custom function using the above method is not recommended as your code might get overridden by your theme when you update your theme to the newer version.
I strongly recommend you to create a custom plugin dedicated to hosting custom functions for a permanent custom function addition. You can jump to this section for the detailed instructions.
— Preloading Featured Images
In most cases, featured image is placed at the top section of the blog post template, right before the content area. This means, featured image is one of the above the fold elements. Preloading it can help increase the LCP score of your blog posts.
The problem is that WordPress has no built-in feature to automatically preload featured images. While manually preload every single featured image can ruin your content creation workflow.
There are two ways to automatically preload featured images in WordPress.
# Manual Method
The first method, the manual method, is by adding a custom function. For this, you need to edit the functions.php file of your active theme or create a custom plugin like you did with static images above.
First, go to Appearance -> Theme File Editor (or Tools -> Theme File Editor if you use a block theme) on your WordPress dashboard and select the functions.php file on the Theme Files panel.
Then, add the following code snippet right after the last line of the file content.
add_action( 'wp_head', function () {
	$featured_img_url = get_the_post_thumbnail_url( get_the_ID(), 'full' );
	if ( ! $featured_img_url ) {
		return;
	}
	echo '<link rel="preload" as="image" href="' . $featured_img_url . '"/>';
} );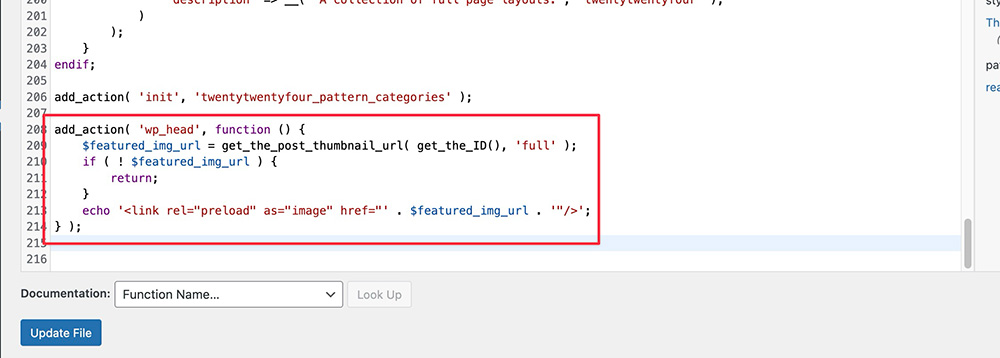
The above code will automatically get the URL of featured image on each blog post on your website and add it to the <head> of the blog post.
Don’t forget to click the Update File after adding the code snippet.
# Using a Plugin
If dealing with code looks scary for you, then you can use the plugin approach to preload featured images.
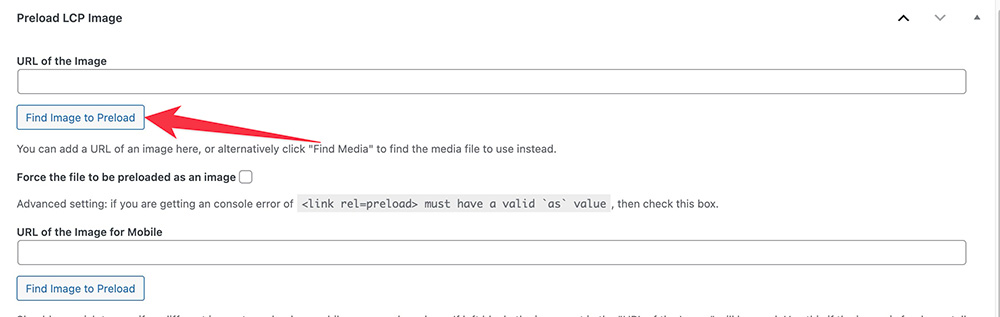
A plugin that you can use for this particular purpose is Preload LCP Image.
Simply install the plugin on your website. Once installed, go to Settings -> Preload LCP Image on your WordPress dashboard.

On the Preload LCP Image settings screen, check the Default to Featured Image option. This setting option will automatically preload featured images on your blog posts. Be it new posts or old posts.
Don’t forget to click the Save Changes button to apply the change.

If you prefer to manually preload featured image on each blog post, you can leave the default settings.
Then, every time you write a new blog post, you can scroll down to the Preload LCP Image section and select the image you want to preload by clicking the Find Image to Preload button.
Just make sure to select the same image as the one you use for featured image.
Testing the Results
If you are still not convinced whether your images have been preloaded after trying one of the above methods, you can check it.
To do so, first, open the page (or blog post) where you preloaded the images of. Right-click anywhere and select Inspect. This will open the Developer Tools window on your web browser.
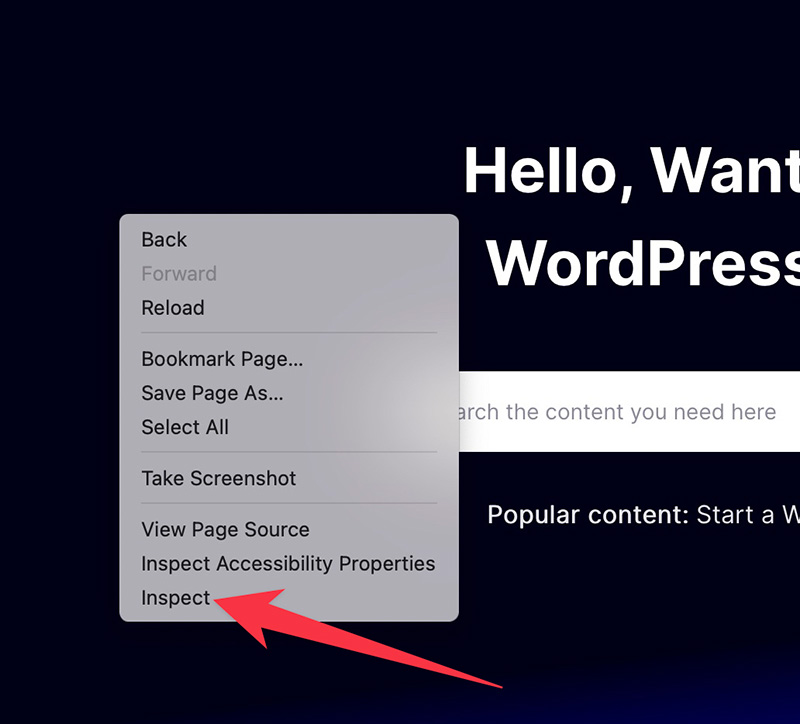
On the Developer Tools window, find the line that preloads the image. To make it easy to find this line, you can use the search feature by pressing Crtl+F keys on your keyboard (Command+F on Mac).
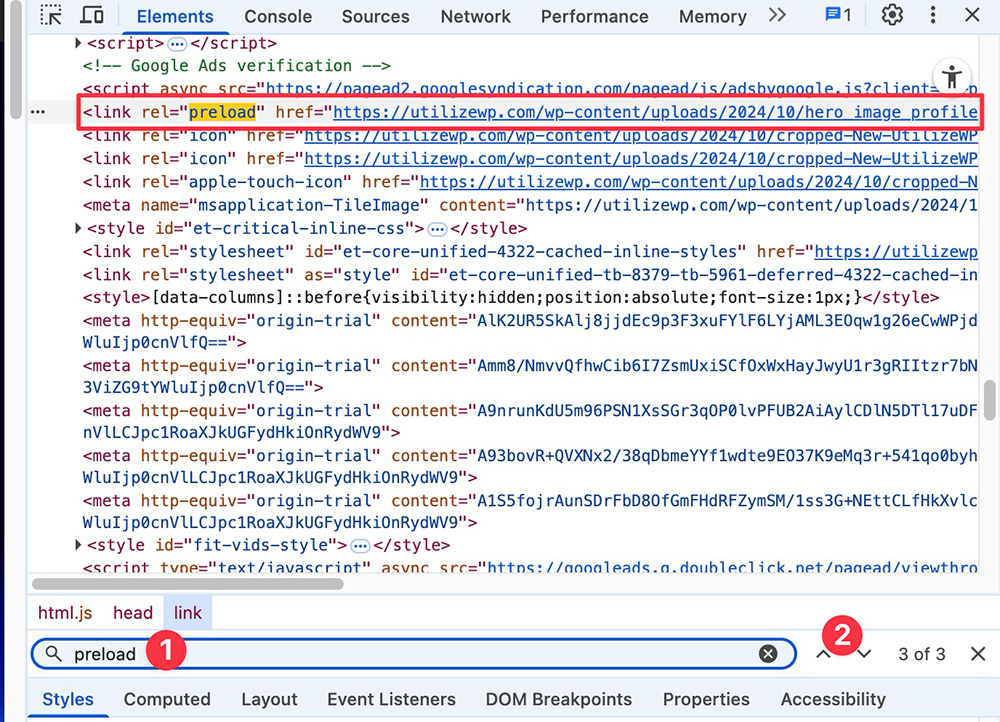
If you find the line, it means your image has been successfully preloaded.
📝 Summary
Preloading images (especially above the fold images) can help improve the LCP score of your website. In WordPress, there are several methods to do so.
If you are a purist, you can preload images by adding a custom function. Be it by editing the theme’s functions.php file or by creating a custom plugin. If you prefer the no-code approach, then you can use the plugin I mentioned.
Keep in mind that just because you can preload images, it doesn’t mean you need to preload every image. The best practice for this optimization type is to preload only the above the fold images.
The more images you preload, the larger the bandwidth consumption on initial page load will be, which can result in slower page load instead of faster.


