In an attempt to improve user experience on your website, you may want to add a table of contents on a blog post and wonder if there is a way to add one without needing to install a plugin.
The answer is, yes. You can add a table of contents on a blog post without a plugin. WordPress has a built-in feature you can leverage to do so.
You can also use it to create a one-page navigation and several other use cases.
In this post, I will show you how to use this built-in feature of WordPress to create a table of contents to improve user experience on your website.
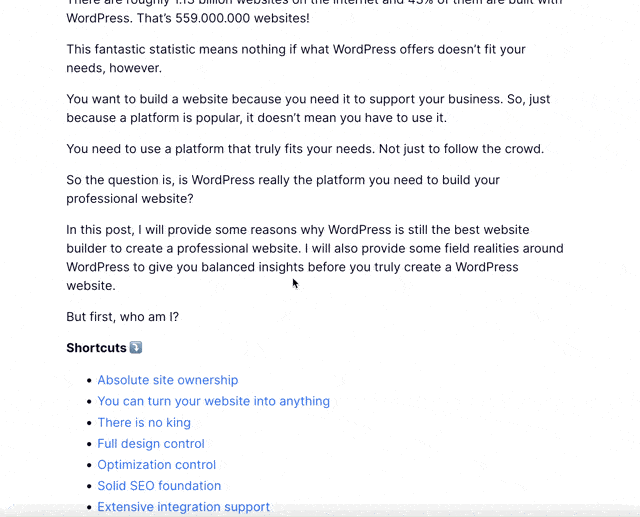
Shortcuts ⤵️
- HTML anchor intro
- Using HTML anchor to create ToC
- Styling up ToC
- Using HTML anchor to link to a specific page section
- Summary 📝
A Brief Intro to HTML Anchor
The built-in WordPress feature that you can use to create a table of contents is HTML Anchor.
Well, HTML Anchor is technically not a WordPress feature. Instead, it is a HTML feature which is used to create a hyperlink which can take someone to another web page, both off-site or on-site.
In HTML, anchor is defined using the <a> tag. In this tag, you can add several attributes, including the href attribute which is used to add the link (destination). This is the most common attributes in this tag.
What you may not know is that the link you can add to the href attribute doesn’t always point to a page but also deeper, to a specific area of a page.
Take a look at the following screencast for an example.

In the above example, you can see that after clicking the link, a site visitor is directed to a specific area of a page.
In the above example, a visitor is directed to a specific area on a different page from the page he/she is currently accessing.
But you can also use HTML Anchor to direct your visitors to a specific area on the same page. Like the one below.
WordPress comes with a built-in feature to make it easy to add HTML Anchor, which you can leverage to create a table of contents.
Some Rules When Adding HTML Anchor
In WordPress, HTML Anchor can be added to several blocks. Such as the Paragraph block, the List block, the Heading block, Image block, etc.
Although you can use any block for your table of contents, the List block is the most suited one because it allows you to add multiple anchor texts in a list format.
Some rules you need understand before you add an HTML Anchor:
- HTML Anchor must be unique on each page (document)
- HTML Anchor is case-sensitive. Meaning that a lower case and upper is considered different character (e.g., H is different from h)
- HTML Anchor can contain numbers and letters, but must start with a letter
- HTML Anchor can’t contain a space. To add a two-word HTML Anchor, you can use hyphen (-), underscore (_), colon(:), or period(.)
Using HTML Anchor to Create a Table of Contents
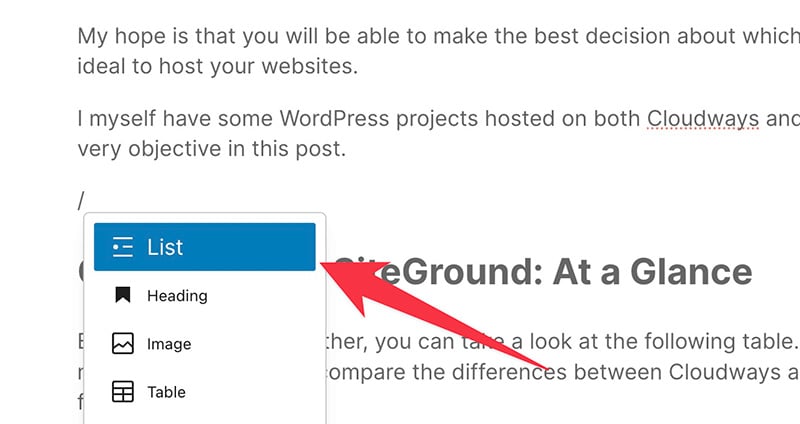
As mentioned above, you can use any block in the WordPress editor for your table of contents, but the List block is the most suited one. So in this example, I will use this block.
Start by editing a blog post or page where you want to add the table of contents on and add the List block.
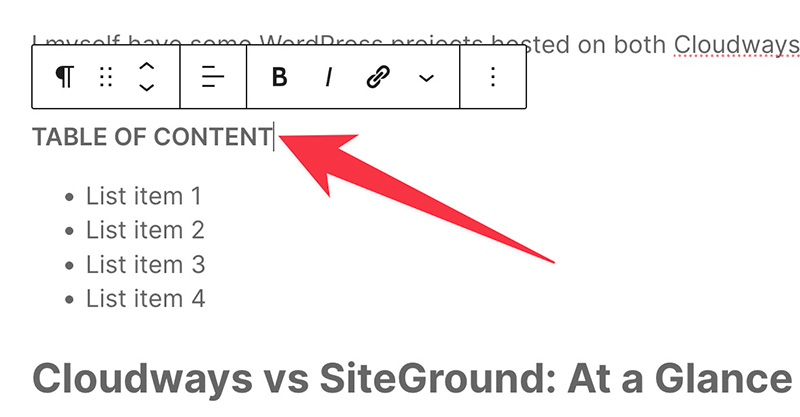
You can add items to the list according to the number of HTML Anchors you want to add to your table of contents.
For cleaner functionality, you can also use the Paragraph block to add a title of your table of contents.
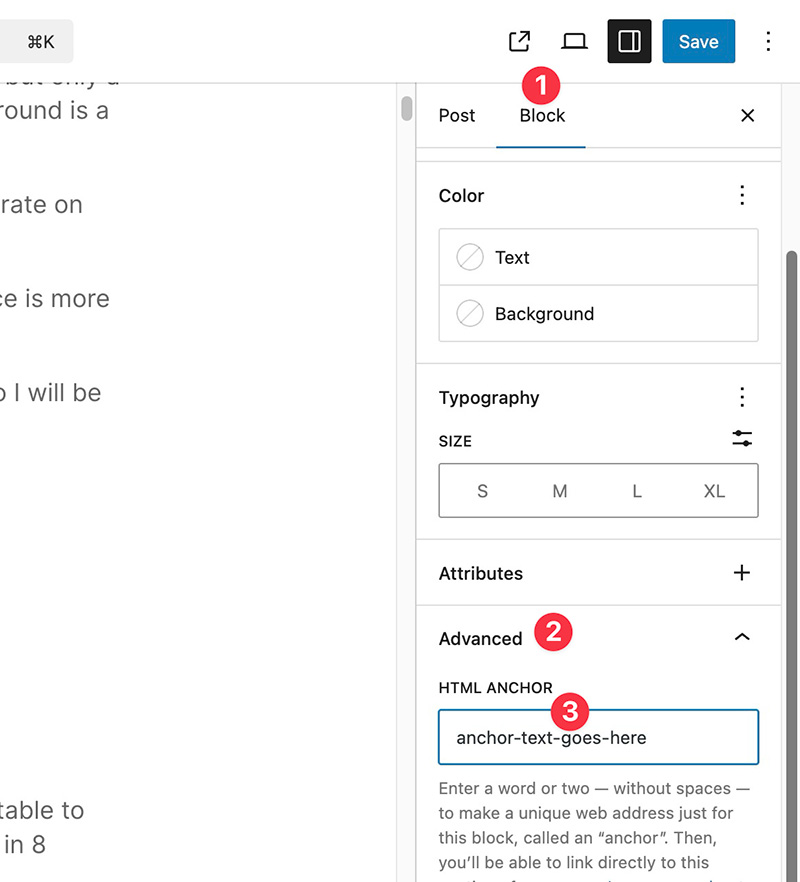
Next, go to the first block where you want to add your first HTML Anchor. This is the block where your visitors will be directed to after clicking a list item on the table of contents.
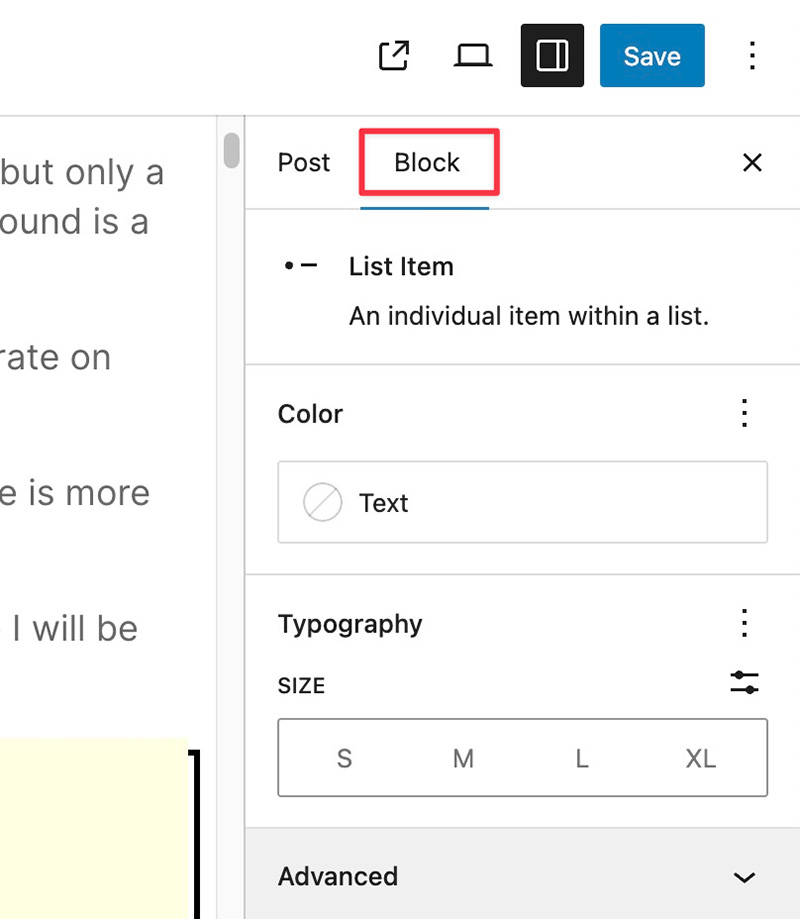
Go to the Block tab on the settings panel and open the Advanced settings block. Add your anchor text on the HTML ANCHOR field.
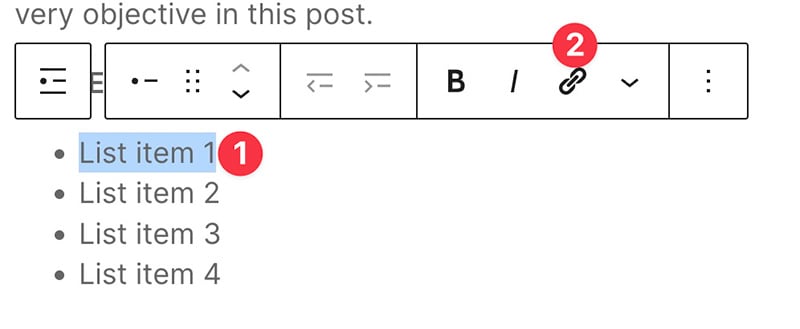
Next, go to the List block and select an item you want to link to the above block. Next, block the item and click the chain icon to add a link.
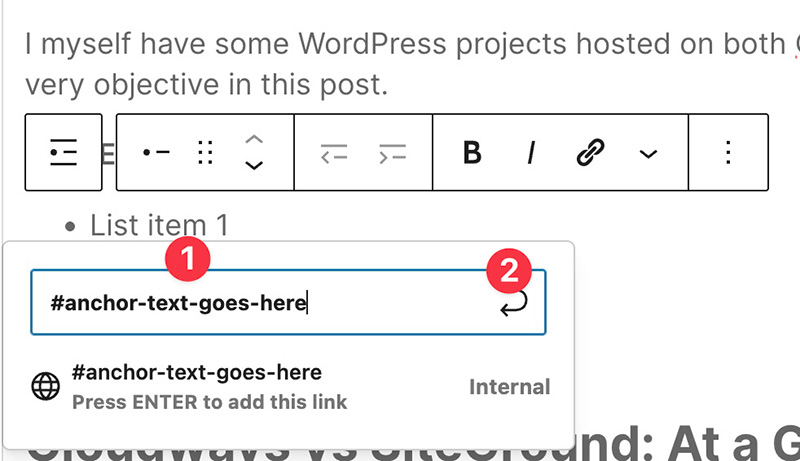
Add your HTML Anchor to the appearing field and use hashtag as the prefix and click the submit icon.
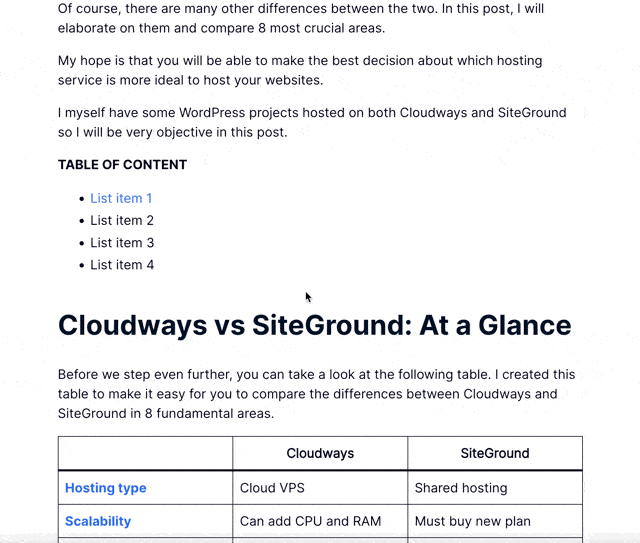
You can preview your post to test the result.
You can repeat the above steps on the remaining list items on your table of contents. Once done, you can move on to the next section below to style up your table of contents.
Styling Up the Table of Contents
Once you are done adding all of the HTML Anchors, you can style up your table of contents to make it more appealing to visitors.
Unlike Divi and other page builders, the default styling options available on Gutenberg are limited enough, but you can still set things like text size and text color.
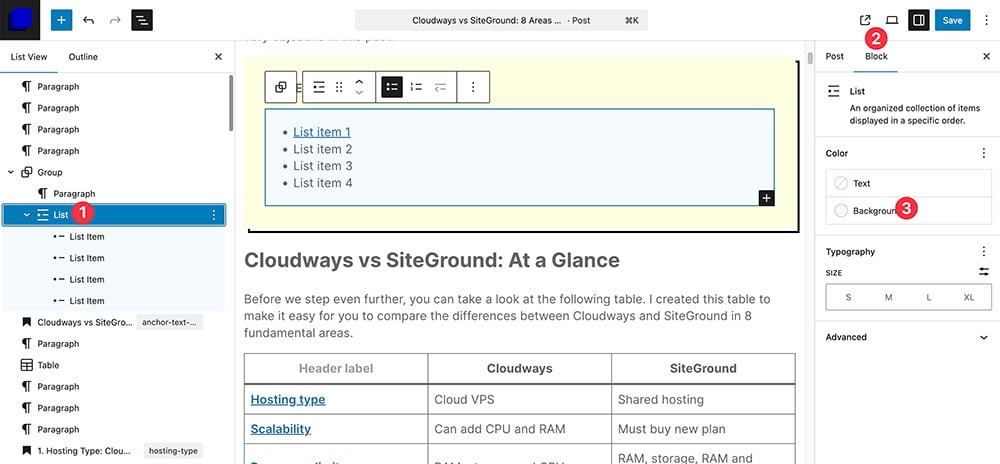
You can simply select the individual elements (title and list items) on your table of content and go to the Block tab on the settings panel to style them up.
Setting the Background of the Table of Contents
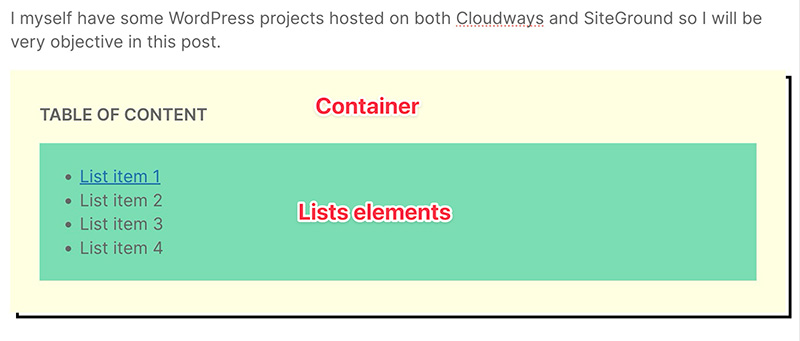
If you want it, you can also set the background of your table of contents. There are two elements you can set the background of: the lists element and the entire table of contents (container).
To set the background of the lists area, first select the List block and go to the Block tab on the settings panel and click the Background menu.
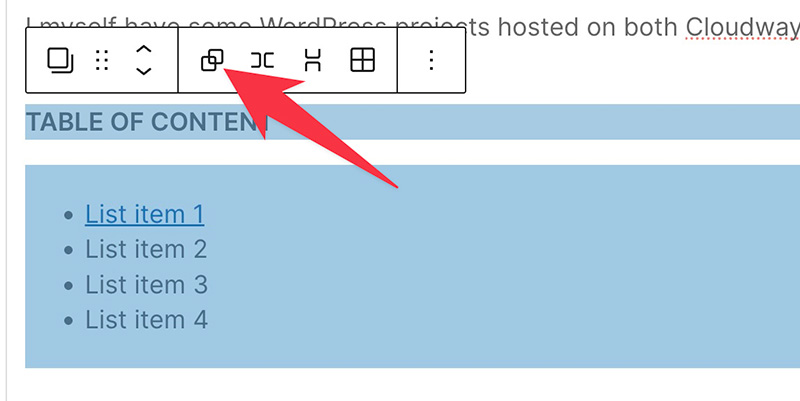
To set the background of the container, you need to first group all of the elements on your table of contents. Simply select all elements (by blocking the elements) and click the Group icon to do so.
After grouping the selected elements (aka blocks), you can go to the Block tab on the settings panel and open the Styles tab to set the background.

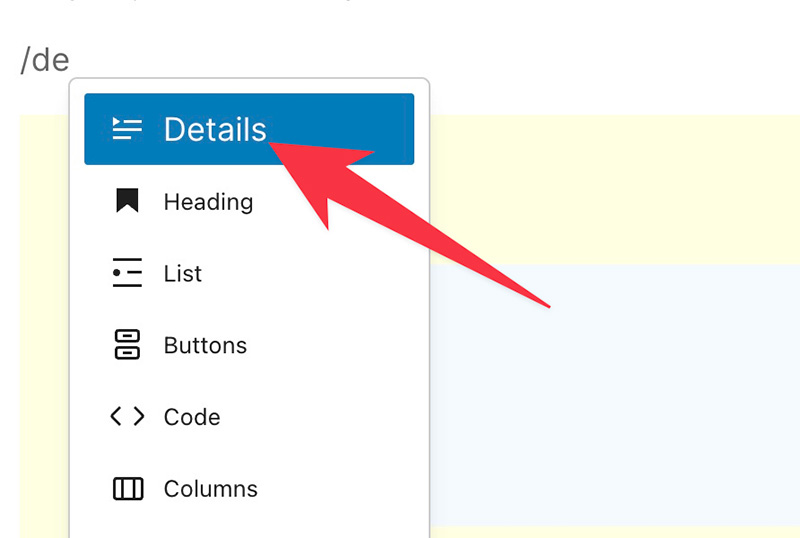
Creating a Collapsible Table of Contents
If you use the List block to create a table of contents, all list items on your table of contents will be visible immediately after the page is loaded.
If you want to involve an interaction from visitors, you can also create a collapsible table of contents.
To create a collapsible table of contents, you can use the Details block and add your list items to this block.
First, simply add the Details block.
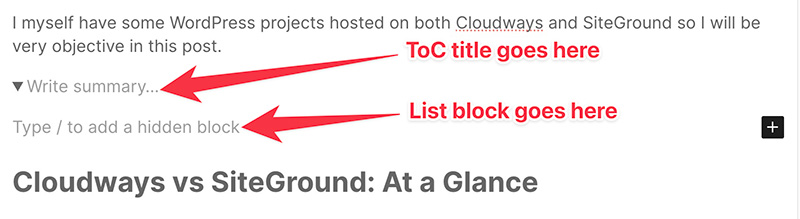
Add the title of your table of contents on the Write summary section and add List block on the hidden block section.
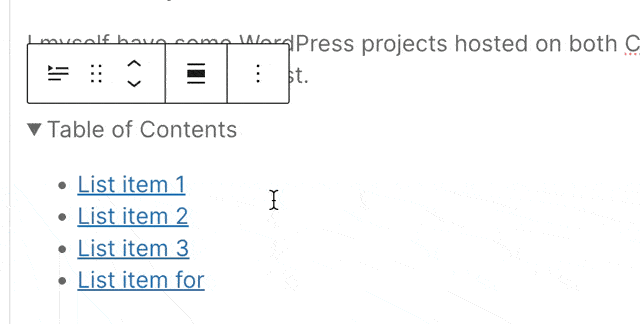
Here is an example of a collapsible table of contents created with the Details block and the List block.
Using HTML Anchor to Link to a Specific Section of a Page
As I said, not only can you use HTML Anchor to create a table of contents without using a plugin, but you can also use it to link to a specific section of a page (see the example above).
If you want to create this type of navigation, first edit the page (or blog post) you want your visitors to be directed to the specific area of.
Specify the area (block) you want and open the Advanced settings block under the Block tab on the settings panel. Add your HTML Anchor on the HTML ANCHOR field.

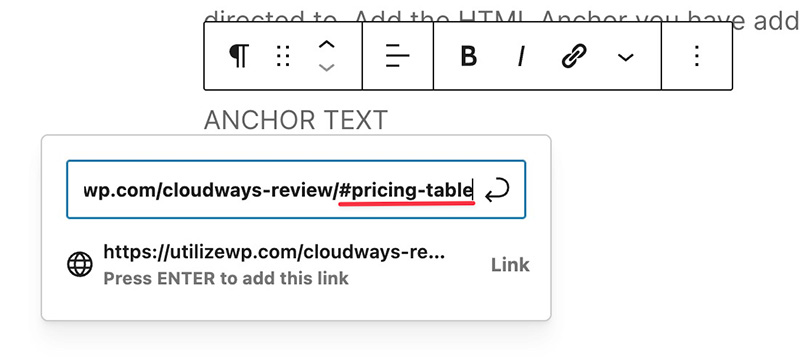
Next, go to an area where you want to add the anchor text (the clickable text) for the HTML Anchor. It can be on a blog post, on the footer, on the header. Anywhere you want.
Then, block the text to add a link and paste the URL of the page you want your visitors to be directed to. Add the HTML Anchor you have added above to the end section of the URL. Don’t forget to include the hashtag.
Summary
Table of contents is a common feature found on long articles. This simple feature offers a better reading experience and makes visitors last longer on your website.
WordPress has a built-in feature to create a table of contents, but not all users know about it.
Sure, you can use a plugin to create a table of contents. But why install a new plugin when WordPress already has the feature you need?
To create a table of contents without using a plugin, all you need is to understand how HTML Anchor works. WordPress allows you to add HTML Anchor on Gutenberg blocks, which you can leverage to create table of contents.